Training Tip: Using Custom Fonts with Sencha Architect
 Back in the days when websites were restricted to typical fonts such as Arial, Georgia, Times and so on, fonts were delivered from the user’s machine. Fortunately today, because of HTML5 and CSS3, browsers support embedded web fonts.
In this month’s training tip, I will explain how to use custom fonts with Sencha Architect. For this tutorial, I will use one of the Sencha Touch starter apps, with the default theme. However, you can also use these tips for other Sencha Touch or Ext JS apps.
Incorporating a custom font from a font service
If you haven’t done so, drag the Default theme into your project (I used one of the Sencha Touch starter apps). Apply the Default theme, to create a custom theme extension.
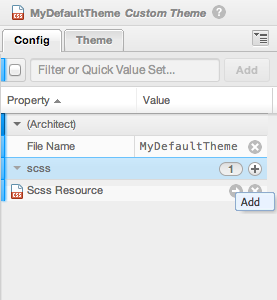
- Select the MyDefaultTheme, and click on the scss + button, to add a new Sass snippet.
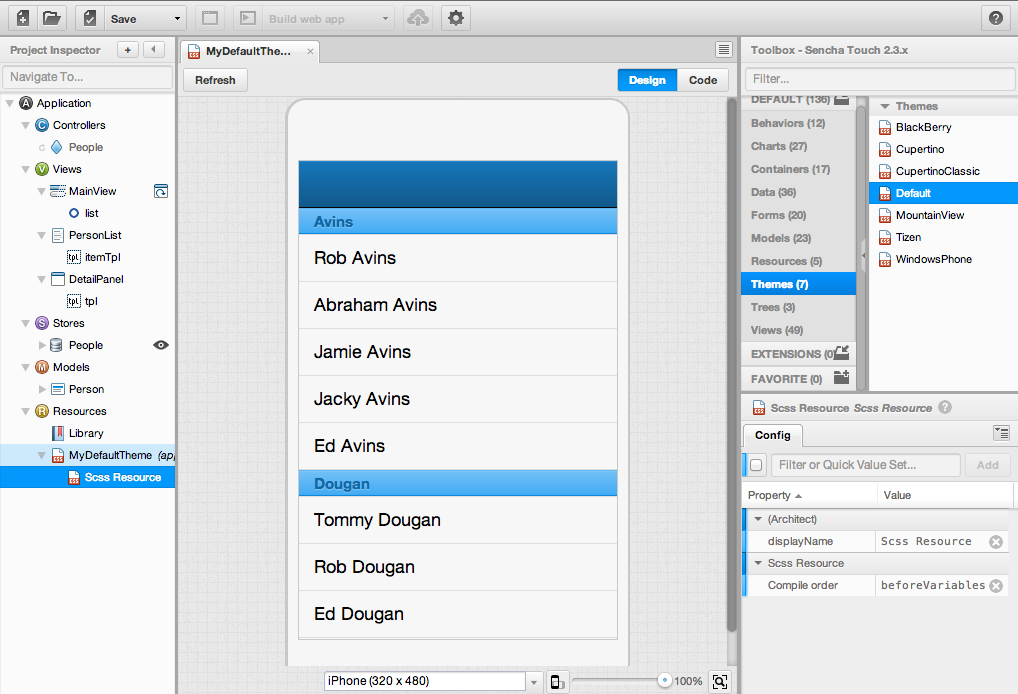
- Click on the right arrow button of the Scss Resource to enter the Sass code snippet properties.
- Set the compile order to
beforeVariables - A font service (or online font provider) is a directory of free hosted web fonts. This is nice, because with a font service, you don’t need to host the fonts locally, and therefore you don’t have to deal with font copyrights. There are a couple of popular font services, such as Google Web Font or Typekit.
- Open Architect, in the Code editor paste the font code, for example:
- Select the MyDefaultTheme and click on the Theme tab in the config inspector.
- Here, filter for font. In Ext.Class, you can set the font family. Set it to the following value (depending on the font you choose):

Note: One thing you should know about working with custom fonts is that font imports must always be at the very top of your stylesheet. If you don’t change the compile order of the Scss resource, this snippet will be inserted after all the Sencha theme styles are inserted. That would cause your custom fonts to not be visible.
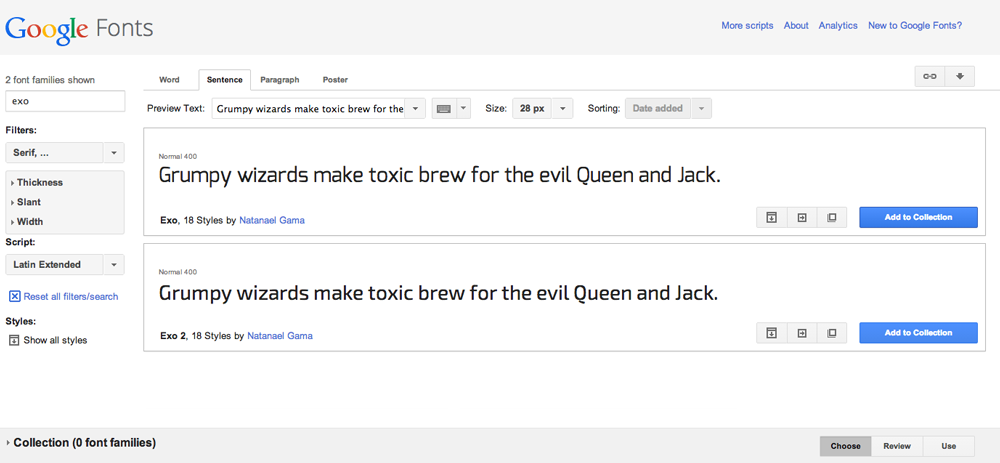
Let’s use Google Web Font and you can choose a font you like.
Once, you have found the font you want, click the Add to Collection button.
Next, click the “Use” tab. Scroll down to paragraph #3, and click the @import tab. Then, copy the code it displays.
url(http://fonts.googleapis.com/css?family=Exo&subset=latin,latin-ext);
Now go back to the Design view, (if you don’t see anything, hit the “Refresh” button) and preview your new font.
Incorporating a custom @font-face (local) font
But what if you want to use your own font? Or, maybe your company has its own font you want to use. Before we get into that, let me explain a little more about local fonts.
@font-face is a CSS technique used to integrate custom web fonts. With system fonts, it picks the font if available in your OS, @font-face downloads the font from the Internet. Unfortunately, the major browsers have not standardized on one web font solution. Therefore, you have to embed multiple webfont extensions into your stylesheet.
You can get these packages of fonts online. For example, http://www.fontsquirrel.com is a website where you can download fonts, 100% free for commercial use.
- Select the MyDefaultTheme, and click on the scss + button, to add a new Sass snippet.
- Click on the right arrow button of the Scss Resource to enter the Sass code snippet properties.
- Set the compile order to
beforeVariables - Now let’s download a nice font-face kit from font-squirel.com to your hard drive, for example:
http://www.fontsquirrel.com/fonts/exo-2 - Extract the zip file, and open one of the regular font folders. Check out the .css stylesheet that’s included, and copy the import lines of code.
- Go back to Sencha Architect, in the Code editor of the MyDefaultTheme, and paste the import. For example:
- Now save your Architect project, and copy the 4 font extensions over to your project resources folder in your file system; if you want, you may create a subfolder fonts here.
- Since my fonts are located in
resources/fonts/ , I need to fix the path in my Architect snippet. Sencha Architect expects the fonts to be located in the/theme/ folder. I also renamed the font-family name: - Select the MyDefaultTheme, and click on the Theme tab.
- Here, filter for font. In Ext.Class, you can set the font family. Set it to the following value: (depending on the font you choose):
- Compile your project, and test the result in your browser. You will see the new font.
Click on the Webfont kit tab, make sure the following extensions are included in the package: ttf, eot, woff, svg, and hit the blue Download @Font-face Kit button.
font-family: ‘exo_2.0regular’;
src: url(‘Exo2.0-Regular-webfont.eot’);
src: url(‘Exo2.0-Regular-webfont.eot?#iefix’) format(’embedded-opentype’),
url(‘Exo2.0-Regular-webfont.woff’) format(‘woff’),
url(‘Exo2.0-Regular-webfont.ttf’) format(‘truetype’),
url(‘Exo2.0-Regular-webfont.svg#exo_2.0regular’) format(‘svg’);
font-weight: normal;
font-style: normal;
}
@font-face {
font-family: ‘Exo2’;
src: url(‘../../resources/fonts/Exo2.0-Regular-webfont.eot’);
src: url(‘../../resources/fonts/Exo2.0-Regular-webfont.eot?#iefix’) format(’embedded-opentype’),
url(‘../../resources/fonts/Exo2.0-Regular-webfont.woff’) format(‘woff’),
url(‘../../resources/fonts/Exo2.0-Regular-webfont.ttf’) format(‘truetype’),
url(‘../../resources/fonts/Exo2.0-Regular-webfont.svg#exo_2.0regular’) format(‘svg’);
font-weight: normal;
font-style: normal;
}
Looking for more help with theming for Sencha Touch? Sign up for a training class. In July, we will offer an advanced Sencha Touch online theming course.

We’re excited to announce the official release of Rapid Ext JS 1.0, a revolutionary low-code…

The Sencha team is pleased to announce the availability of Sencha Architect version 4.3.6. Building…

Sencha, a leader in JavaScript developer tools for building cross-platform and enterprise web applications, is…


