Sencha Test Tip: Execute Tests on Multiple Browsers Simultaneously

The Ext JS framework includes the most comprehensive collection of high-performance components for building your apps. And, you can create robust test automation strategies using Sencha Test to test components rather than relying on the visible elements in the Document Object Model (DOM). The Sencha Test API layer provides easy access to Ext JS components with specific API methods that allow you to write concise tests.
Upcoming webinar
Join us for our upcoming webinar on using Sencha Test and Sauce Labs, where we’ll provide real-world examples. You’ll learn how to scale the automated test suite to over thousands of test cases and cross-browser combinations for a complete regression cycle.
Register Now
May 17, 2017
10am PDT | 1pm EDT | 6pm BST
4 Ways to Run Tests on Multiple Browsers
There are four ways to run tests on multiple browsers. You can choose from:
- Sencha Studio Test Runner on local browsers
- Sencha Studio Test Runner on an embedded browser/Selenium configuration
- Selenium Grid infrastructure
- Browser Farm such as Sauce Labs or BrowserStack
Cross Browser Test Execution – In-Browser Scenario
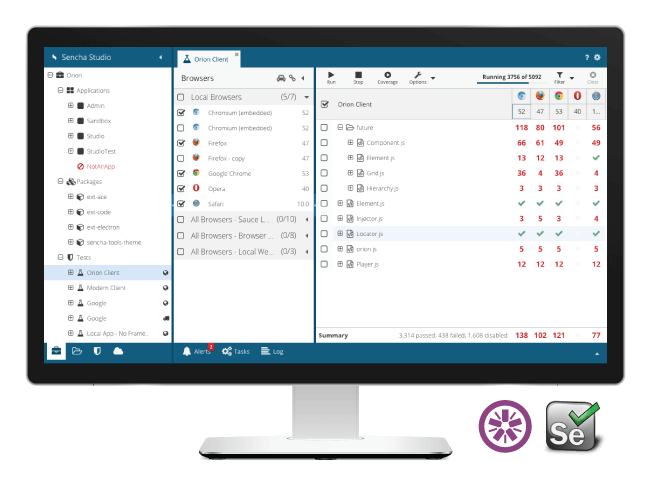
Sencha Studio’s Test Runner is a very powerful component. If you’re testing a single page application, you can simply create an in-browser scenario, and the Test Runner will automatically scan and make all major local browsers available for test execution.
Now, simply select the browser you want or select-all and execute tests. This is the easiest way to execute tests on multiple browsers simultaneously.
Cross-Browser Test Execution – WebDriver Scenario
If you’re testing a multi-page application, the in-browser scenario is not the best solution. Instead, start by creating a WebDriver scenario in Sencha Studio. If you’re running in developer mode, the option to choose a WebDriver scenario will be under the “Scenario Settings > Advanced” section. If you’re running in test automation engineer mode, “WebDriver” is the only available scenario.
The Test Runner has an embedded browser (Chrome) and an embedded Selenium server within Sencha Studio. This allows you to execute and debug tests before running them on multiple browsers. In order to run tests on multiple browsers simultaneously, you need a Selenium Grid or a connection to a Browser Farm. Sencha Test has been configured to work out-of-the-box with Selenium Grid and Browser Farms. Sencha Studio provides an easy way to enter the required credentials to access the grid or farm and start using it very quickly. This week, we’ll look at how to execute tests on browser farms.
Creating the Browser Farm
- In Sencha Studio, navigate to the “Browsers” tab
- Click on the “Add” button and select Sauce Labs
- Provide a name for the browser farm. In this case, we’re calling it “SauceLabs-Connection”
- A success message will be displayed
- Once the farm is created, click on it and a screen with user credential information will be displayed
- The default hostname and port for Sauce Labs will be prepopulated
- Enter the username and the access key from the Sauce Labs account details page
- Select the total number of virtual machines (VMs) to be spun up for test execution
Creating the Pool
Now that the farm is created, we need to select the browsers that we want to test against and create a pool. The pool name will be used for running tests from Sencha Studio Test Runner as well as Sencha Test Command Line Interface (CLI).
- Create a pool and make sure that it’s stored within the workspace
- Once the pool is added successfully, add browsers to the pool
- Provide some basic information about browsers that you’re selecting, e.g. browser version, operating system, etc.
- Click Save
- Add all the required browsers and save the config
A similar process can be used to set up a browser pool using BrowserStack.
Cross-browser test automation is very important, especially for consumer-facing applications. Sencha Test allows you to run the same test across multiple browsers without having to explicitly code browser-specific instructions.
Our Tip of the Week emails provide you with a variety of best practices and tips and tricks, so you can get up to speed quickly on using Sencha Test. Sign up now.
Get more information about other Sencha Test APIs. Share your feedback and questions in the Sencha Test forum.
Happy Testing!

The Sencha team is pleased to announce the latest Ext JS version 7.8 release. Following…

The world is moving fast towards online businesses. Businesses are established online via social media,…

In modern software development, unit testing has become an essential practice to ensure the quality…


 Rapid Ext JS


