How to Upgrade Your Ext JS 3.4 Apps to Ext JS 6
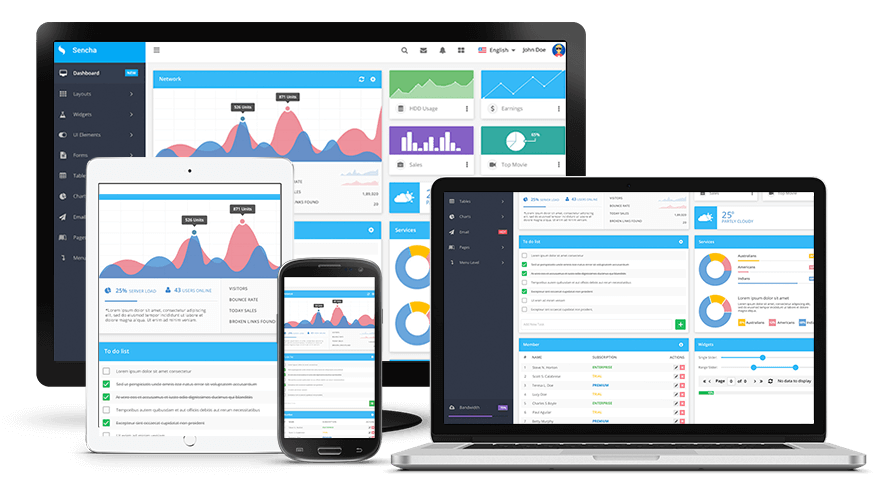
Ext JS is a mature framework. We’ve added a tremendous number of powerful new features and capabilities since the first release in 2007. Thousands of applications have been written using different versions of the framework. And some of these successful projects are still using Ext JS 3.4.
Some developers want to migrate their projects to the latest version, so they can take advantage of new features but are uncertain about the process. Many of them list the same reasons for why they haven’t migrated yet. They have a stable application, and all bugs are fixed and everything works well. At the same time, the application is complex and contains numerous custom components and extensions, so they believe the migration will not be easy.
On the other hand, almost all of them name the same advantages of upgrading to Ext JS 6:
- Don’t have to control all browser updates.
- Reduce time and effort of maintaining their application.
- Improve performance and memory use.
- Take advantage of support for mobile devices and touch events.
- Access to new Ext JS features and functionality that can be added
with a couple of lines of code.
We always recommend that our customers migrate their applications to the most recent version of the framework – Ext JS 6.
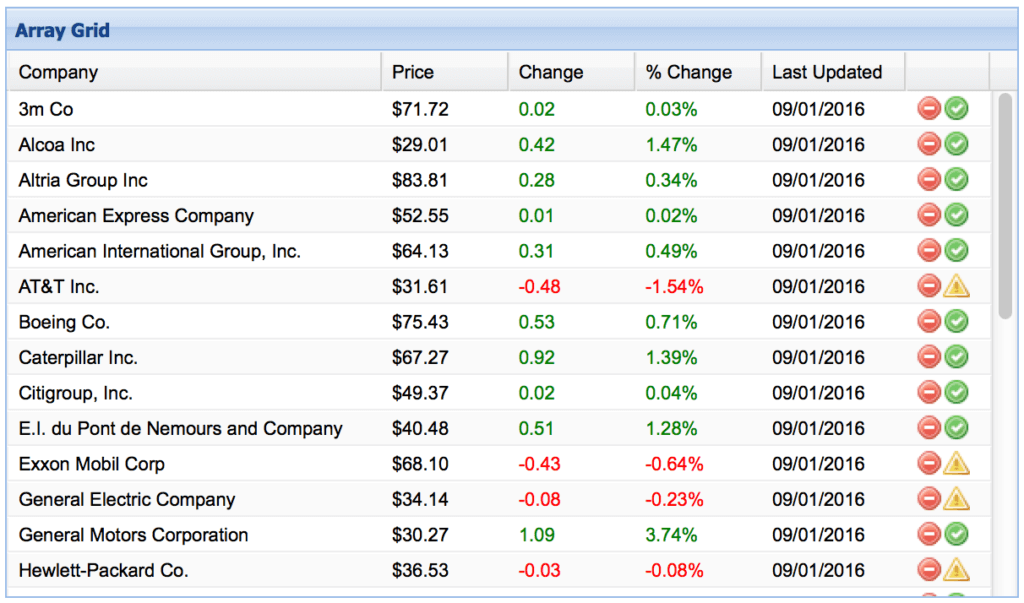
In this article, I will show you a simple example of a migration. As proof of concept, I have an Ext JS 3.4 grid example, and I migrated it to Ext JS 6. You can review the source code of the original and final applications.
We will build our new Ext JS 6 application based on the MVVM (Model-View-ViewModel) architectural pattern. MVVM provides an abstraction of a View (the ViewModel) that manages the changes between a Model‘s data and the View‘s representation of that data (i.e. data bindings). Read more about MVVM pattern.
Generate a new empty Ext JS 6 project
We can generate an empty Ext JS 6 project using the command line tool Sencha Cmd. Just navigate to Ext JS 6 SDK folder with your command-line or terminal, and run the following command:
sencha generate app -classic -starter=false Migration ../migration
You can read more about Sencha Cmd features.
Initialize a new project
We need to add Application and Main View classes to our empty project. These classes are necessary to run our application.
- We can generate the Main view using Sencha Cmd as well. Go to a newly created migration folder and run this command:
- We will generate the Application class manually. Create a file app/Application.js with this content:
- The last step is building our Ext JS 6 application and running it using an internal web server. Run the following commands from migration folder:
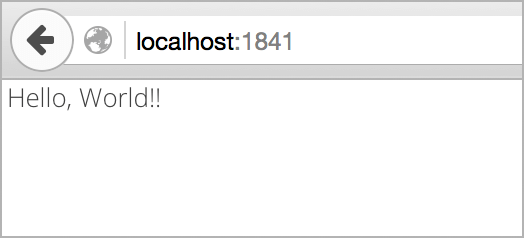
- Navigate to http://localhost:1841/ with your browser to check that the application is running. You should see the following screen:
sencha generate view main.Main
Ext.define('Migration.Application', {
    extend: 'Ext.app.Application',
    name: 'Migration'
});
sencha app build
sencha web start
Migrate the Model
Now we can start the actual migration of our Ext JS 3.4 code into our new Ext JS 6 project. The first step here is to migrate the Model. The Model describes a format for the data being used in the application. In Ext JS 3.4, the data format should be defined inside of a store definition using the fields property.
var store = new Ext.data.ArrayStore({
    fields: [
        {name: 'company'},
        {name: 'price',      type: 'float'},
        {name: 'change',     type: 'float'},
        {name: 'pctChange',  type: 'float'},
        {name: 'lastChange', type: 'date', dateFormat: 'n/j h:ia'}
    ]
});
It’s a backward compatible approach, so it’s possible to define the data format in the same way in newer versions, including Ext JS 6. But the proper way to do it would be a definition of a separate Model class, where we can define fields and other logic related to the data.
- Create a Model class
- Create app/model/Company.js file with this content:
- Copy fields property from Ext JS 3.4 store to our model:
Ext.define('Migration.model.Company', { extend: 'Ext.data.Model' });Ext.define('Migration.model.Company', { extend: 'Ext.data.Model', fields: [ {name: 'company'}, {name: 'price', type: 'float'}, {name: 'change', type: 'float'}, {name: 'pctChange', type: 'float'}, {name: 'lastChange', type: 'date', dateFormat: 'n/j h:ia'} ] });The Store stays basically the same as in Ext JS 3.4. It is a collection of records (instances of a Model class).
- Create a Store class
- Create app/store/Company.js file with this content:
- Our Store class should use our newly created Model:
Ext.define('Migration.store.Companies', { extend: 'Ext.data.ArrayStore', alias: 'store.companies' });Ext.define('Migration.store.Companies', { extend: 'Ext.data.ArrayStore', alias: 'store.companies', requires: ['Migration.model.Company'], model: 'Migration.model.Company' });
Migrate the View
The basic usage of Grid Panel stays the same as in Ext JS 3.4. The main difference is that now we need to define our Grid Panel in a separate View class.
- First we should create an empty template View class for our Grid Panel. Run the following command from the migration folder:
- Edit app/view/company/Grid.js file:
- Set base class to Ext.grid.Panel (not Ext.grid.GridPanel like it was in Ext JS 3.4):
extend: “Ext.grid.Panel” - Add xtype: ‘companygrid’ property, this is the reference to our Grid Panel that we will use later
- Remove html property
- Set base class to Ext.grid.Panel (not Ext.grid.GridPanel like it was in Ext JS 3.4):
- Copy the Ext JS 3.4 grid column definition and other properties of Grid Panel into new Grid View and comment out all functions for now (we will migrate them later).
- Remove autoExpandColumn: ‘company’ config and add flex: 1 config to the Company column. The flex properties are a new way to manage column width. You can read more about Ext.Component-cfg-flex.
- Change icon and getClass properties of action column to iconCls with references to FontAwesome icons.
- Now we need to add our Grid to the Main View. Our Main View is an instance of Ext.panel.Panel, and we just need to add our Grid to Main View‘s items array (using previously defined xtype) and requires array (using class name).
- Run the following commands from migration folder:
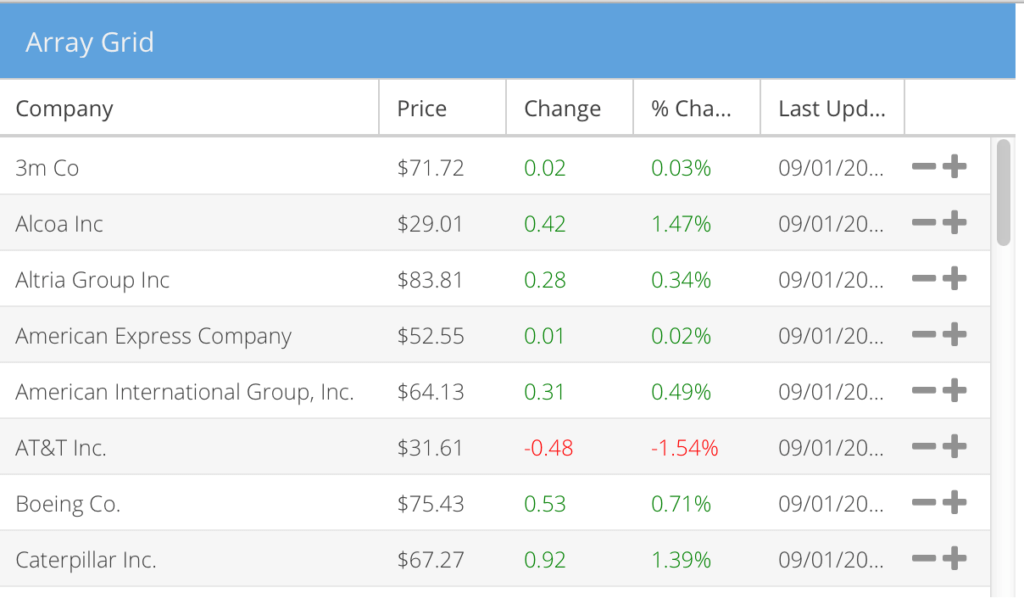
- Navigate to http://localhost:1841/ with your browser to check that the application is working. You should see the following screen:
sencha generate view company.Grid
When you finish, your code should look similar to this:
Ext.define("Migration.view.company.Grid",{
    extend: "Ext.grid.Panel",

    requires: [
        "Migration.view.company.GridController",
        "Migration.view.company.GridModel"
    ],

    controller: "company-grid",
    viewModel: {
         type: "company-grid"
     },

    columns: [
        {
            id       :'company',
            header   : 'Company',
            width    : 160,
            sortable : true,
            dataIndex: 'company',
            flex: 1
        },
        {
            header   : 'Price',
            width    : 75,
            sortable : true,
            //renderer : 'usMoney',
            dataIndex: 'price'
        },
        {
            header   : 'Change',
            width    : 75,
            sortable : true,
            //renderer : change,
            dataIndex: 'change'
        },
        {
            header   : '% Change',
            width    : 75,
            sortable : true,
            //renderer : pctChange,
            dataIndex: 'pctChange'
        },
        {
            header   : 'Last Updated',
            width    : 85,
            sortable : true,
            //renderer : Ext.util.Format.dateRenderer('m/d/Y'),
            dataIndex: 'lastChange'
        },
        {
            xtype: 'actioncolumn',
            width: 50,
            items: [{
                iconCls: 'x-fa fa-minus',
                tooltip: 'Sell stock'/*,
                handler: function(grid, rowIndex, colIndex) {
                    var rec = store.getAt(rowIndex);
                    alert("Sell " + rec.get('company'));
                }*/
            }, {
                iconCls: 'x-fa fa-plus',
	/*
                handler: function(grid, rowIndex, colIndex) {
                    var rec = store.getAt(rowIndex);
                    alert("Buy " + rec.get('company'));
                }*/
            }]
        }
    ],
    stripeRows: true,
    height: 350,
    width: 600,
    title: 'Array Grid',
    stateful: true,
    stateId: 'grid'
});
Ext.define("Migration.view.main.Main",{
    extend: "Ext.panel.Panel",

    requires: [
        "Migration.view.main.MainController",
        "Migration.view.main.MainModel",
        "Migration.view.company.Grid"
    ],

    controller: "main-main",
    viewModel: {
        type: "main-main"
    },

    items: [{
        xtype: 'companygrid'
    }]
});
sencha app build
sencha web start
Create a ViewModel
The ViewModel is a new abstraction that was released in Ext JS 5. It manages changes between the View and an associated Model. When we generated our Grid View using Sencha Cmd, the ViewModel class was generated as well.
- Edit ViewModel file app/view/main/GridModel.js:
- Remove data property from the ViewModel class
- Add companies store to the stores config of the ViewModel class
- Assign data config of companies store to the data from Ext JS 3.4 code
- Bind our Grid to the ViewModel
Ext.define('Migration.view.company.GridModel', {
     extend: 'Ext.app.ViewModel',
     alias: 'viewmodel.company-grid',
     requires: [
          "Migration.store.Companies"
     ],

     stores: {
       companies : {
         type: 'companies',
         data: [
                 ['3m Co', 71.72, 0.02,  0.03,  '9/1 12:00am'],
                 ['Alcoa Inc', 29.01, 0.42,  1.47,  '9/1 12:00am'],
                 …
         ]
       }
     }

});
Now we need to add bind config to our Grid View to bind our grid to companies store from ViewModel:
bind: {
     store: '{companies}'
},
Migrate Code into ViewController
The ViewController is a part of MVVM pattern as well. Individual ViewControllers are created for each related View. They listen for events and execute application business logic. In our case, we will move the commented-out function to ViewController. It will contain handlers for add and delete buttons of actioncolumn and column renderers. ViewController for our Grid View has also been generated by Sencha Cmd.
- Move change function from Ext JS 3.4 example into GridController.js file and rename it to columnRenderer.
- Move pctChange function from Ext JS 3.4 example into GridController.js file and rename it to pctColumnRenderer.
- Move handler function of actioncolumn delete button to GridController.js and rename it to sellStock. Change reference to the store in the code to grid.getStore().
- Move handler function of actioncolumn add button to GridController.js and rename it to buyStock. Change Reference to the store in the code to grid.getStore().
- Add references to this functions inside Grid View and replace renderer : ‘usMoney’ to renderer : Ext.util.Format.usMoney:
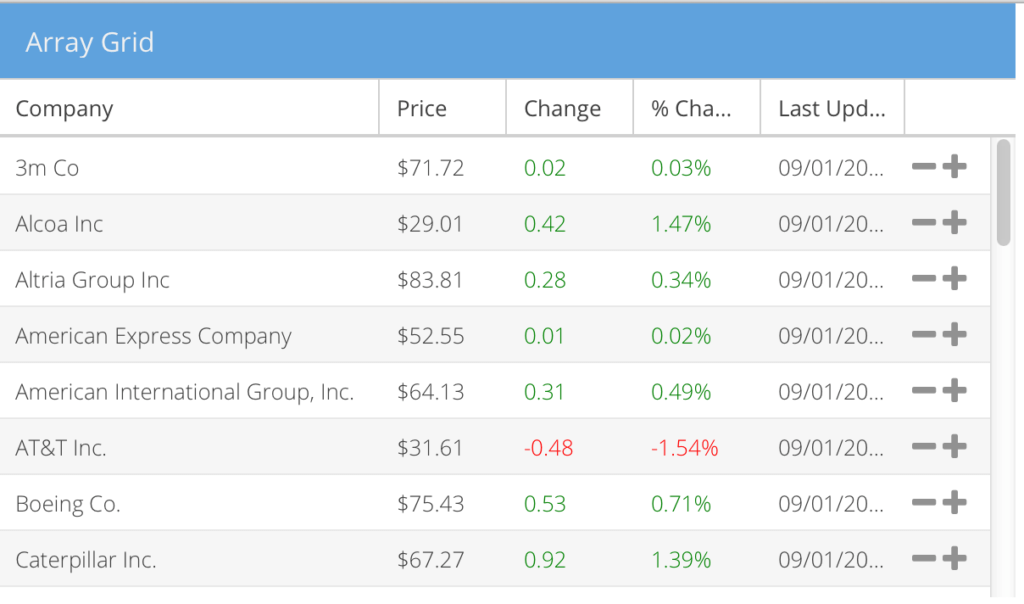
- Navigate to http://localhost:1841/ with your browser to check that the application is working. You should see the following screen:
When you finish, your GridController.js file should look similar to the following code:
Ext.define('Migration.view.company.GridController', {
    extend: 'Ext.app.ViewController',
    alias: 'controller.company-grid',

    columnRenderer : function(val) {
        if (val > 0) {
            return '' + val + '';
        } else if (val < 0) {
            return '' + val + '';
        }
        return val;
    },

    pctColumnRenderer : function (val) {
        if (val > 0) {
            return '' + val + '%';
        } else if (val < 0) {
            return '' + val + '%';
        }
        return val;
    },

    sellStock: function(grid, rowIndex, colIndex) {
        var rec = grid.getStore().getAt(rowIndex);
        alert("Sell " + rec.get('company'));
    },

    buyStock: function(grid, rowIndex, colIndex) {
        var rec = grid.getStore().getAt(rowIndex);
        alert("Buy " + rec.get('company'));
    }

});
Ext.define("Migration.view.company.Grid",{
    extend: "Ext.grid.Panel",

    requires: [
        "Migration.view.company.GridController",
        "Migration.view.company.GridModel"
    ],

    xtype: 'companygrid',

    controller: "company-grid",
    viewModel: {
        type: "company-grid"
    },

    bind: {
        store: '{companies}'
    },

    columns: [
        {
            id       :'company',
            header   : 'Company',
            flex    : 1,
            sortable : true,
            dataIndex: 'company'
        },
        {
            header   : 'Price',
            width    : 75,
            sortable : true,
            renderer : Ext.util.Format.usMoney,
            dataIndex: 'price'
        },
        {
            header   : 'Change',
            width    : 75,
            sortable : true,
            renderer : 'columnRenderer',
            dataIndex: 'change'
        },
        {
            header   : '% Change',
            width    : 75,
            sortable : true,
            renderer : 'pctColumnRenderer',
            dataIndex: 'pctChange'
        },
        {
            header   : 'Last Updated',
            width    : 85,
            sortable : true,
            renderer : Ext.util.Format.dateRenderer('m/d/Y'),
            dataIndex: 'lastChange'
        },
        {
            xtype: 'actioncolumn',
            width: 50,
            items: [{
                iconCls: 'x-fa fa-minus',
                tooltip: 'Sell stock',
                handler: 'sellStock'
            }, {
                iconCls: 'x-fa fa-plus',
                handler: 'buyStock'
            }
            ]
        }
    ],

    stripeRows: true,
    height: 350,
    width: 600,
    title: 'Array Grid',
    stateful: true,
    stateId: 'grid'
});
Conclusion
This guide is just a sample of how to migrate your application from Ext JS 3.4 to Ext JS 6. You can find more information in the upgrade guides:
We’re excited to announce the official release of Rapid Ext JS 1.0, a revolutionary low-code…

The Sencha team is pleased to announce the availability of Sencha Architect version 4.3.6. Building…

Sencha, a leader in JavaScript developer tools for building cross-platform and enterprise web applications, is…


