


Building SharePoint Web Apps using Sencha Touch
April 10, 2012
125 Views
Guest Blog Post: Luc Stakenborg of Oxida
 In this post we will explore how to build a SharePoint mobile web app using Sencha Touch, a great mobile JavaScript framework for building HTML5 apps. SharePoint 2010 is a very comprehensive platform, but mobile support is fairly limited. Although it is technically possible to customize the mobile user interface on the server side, this is not allowed in cloud-based SharePoint (e.g. in Office365).
An alternative approach is to build a web app where the UI is generated in the browser and connects to one of the SharePoint APIs to access data stored in SharePoint. SharePoint 2010 offers three data APIs which can be used in web apps:
* SP Web Services (SOAP)
* REST (ListData.svc)
* CSOM (Client Side Object Model)
Although each of the APIs offer a distinct set of capabilities, the REST interface is simple and lightweight and I prefer this for mobile use. The SharePoint REST interface offers full CRUD access to items in SharePoint lists and libraries, which might be all that you need for your mobile web app.
h3. Getting Started
Because of the Same Origin Policy, your html file must be served from the same domain as the SharePoint site you want to access. You can place your html file containing your app on the server file system or in a SharePoint document library (e.g. site assets).
If you are using SharePoint Online (Office365), you will notice that when you select a .html file in a doc library, it is presented as a download, not opened in the browser. This is due to SharePoint settings which you are not allowed to change in SharePoint Online. As a workaround, simply use an .aspx file extension, instead of .html. This way, you can start your single page SharePoint application from a file in an asset library.
So, to get going, you need to create an app.aspx file to include all the CSS and JavaScript for your Sencha Touch app.
The app.js file contains the basic Sencha Touch start-up and shows an alert:
launch: function () {
Ext.Msg.alert(‘Hello world’, ‘Ready for action!’)
}
});
You can put these files in any SP doc library. Let’s assume you have put this file in the Site Assets library of a SP site called demo:

Now you can open up the following url on your iPhone or Android device:
http://[[SPserver]]/demo/siteassets/app.aspxAfter logon, you will see the following result:

Not quite what we expected… SharePoint has detected that we accessed the page with a mobile device and responds with the default mobile UI. You can suppress the default mobile UI by appending ?mobile=0 to the url.
So, let’s try: http://[[SPserver]]/demo/siteassets/app.aspx?mobile=0

Yes! We now have a Sencha Touch web app running off a SharePoint server.
h3. OData proxy
The next step is to connect Sencha Touch models and stores to SharePoint items and lists through the REST interface using the OData protocol. For this, you will need an OData proxy. I developed an OData proxy as an Ext user extension. It is designed to access SharePoint data using the SharePoint ListData.svc REST service which is based on OData. You may use it for other OData sources.
You can find the OData SharePoint proxy for Sencha Touch on GitHub.
Ext.ux.ODataProxy features:
- create, read, update and delete SharePoint items as Sencha Touch models
- fetch multiple items from a SharePoint list in a Sencha Touch store
- JSON payloads
- partial updates: only changed attributes are sent to the server during an update
- fixes issues in Sencha Touch data Model implementation (e.g. missing destroy() method)
Let’s look at some examples of how you can use the SharePoint proxy. In these examples, we will assume you have a subsite ‘/teamsite’ in which you have created a Contacts list based on the standard Contacts list template.
First, we need to define the Model.
fields: [
// please note CamelCase convention for SharePoint column names
{ name: ‘Id’, type: ‘int’ },
‘LastName’,
‘FirstName’
],
idProperty: ‘Id’,
proxy: {
// use the special odata proxy defined in odataproxy.js
type: ‘odata’,
// the proxy will connect to the List
// named ‘Contacts’ in the /teamsite subsite
url: ‘/teamsite/_vti_bin/ListData.svc/Contacts’
}
});
We can now use the following CRUD operations on the Contact data model:
var contact = new Contact({ LastName: ‘Johnson’, FirstName: ‘Al’ })
contact.save();
…
// Read an instance from the server by id
var id = 200;
Contact.load(id);
…
// Update an instance, loaded from the server
Contact.load(id, {
success: function (contact) {
contact.set(“LastName”, “Maxwell”);
contact.save();
}
});
…
// Delete an instance
Contact.load(id, {
success: function (contact) {
contact.destroy()
}
});
…
Using the Contact model, you can now easily define a Store to fetch multiple items:
model: ‘Contact’
});
store.load()
h3. Build Your Application
Using the odata proxy to configure your Models and Stores that connect to the SharePoint server, you can develop your app further just like any other Sencha Touch app. Check out the tutorials on Sencha.com for more info.
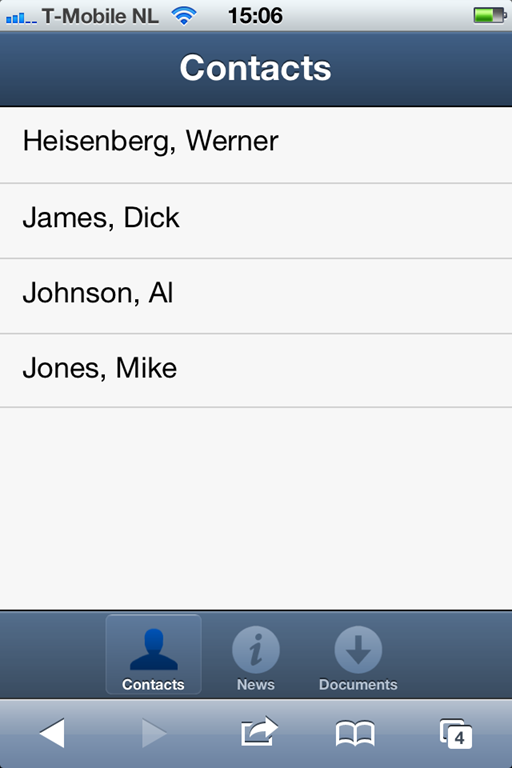
I will conclude with an example of a contact list through the normal SharePoint UI and through a Sencha Touch app:

Just as easily, you can expose the content of document libraries:


h3. Live Demo
A live demo is available at http://oxida.sharepoint.com/demo. You can open the mobile web app and also explore the content of the SharePoint site with a desktop browser.

Sencha Touch and SharePoint are a great combination and open up exciting new opportunities for companies using SharePoint. Give it a try!
Did you find the content helpful?
 0
0

 0
0

Latest Content

Ext JS 7.8 Has Arrived!
The Sencha team is pleased to announce the latest Ext JS version 7.8 release. Following…
May 13, 2024

React Apps Development Using ReExt with Ext JS Components
The world is moving fast towards online businesses. Businesses are established online via social media,…
May 1, 2024

How to Write Unit Tests with Sencha Test
In modern software development, unit testing has become an essential practice to ensure the quality…
April 19, 2024


