


Developing for Google Glass with Sencha Touch
January 29, 2014
280 Views
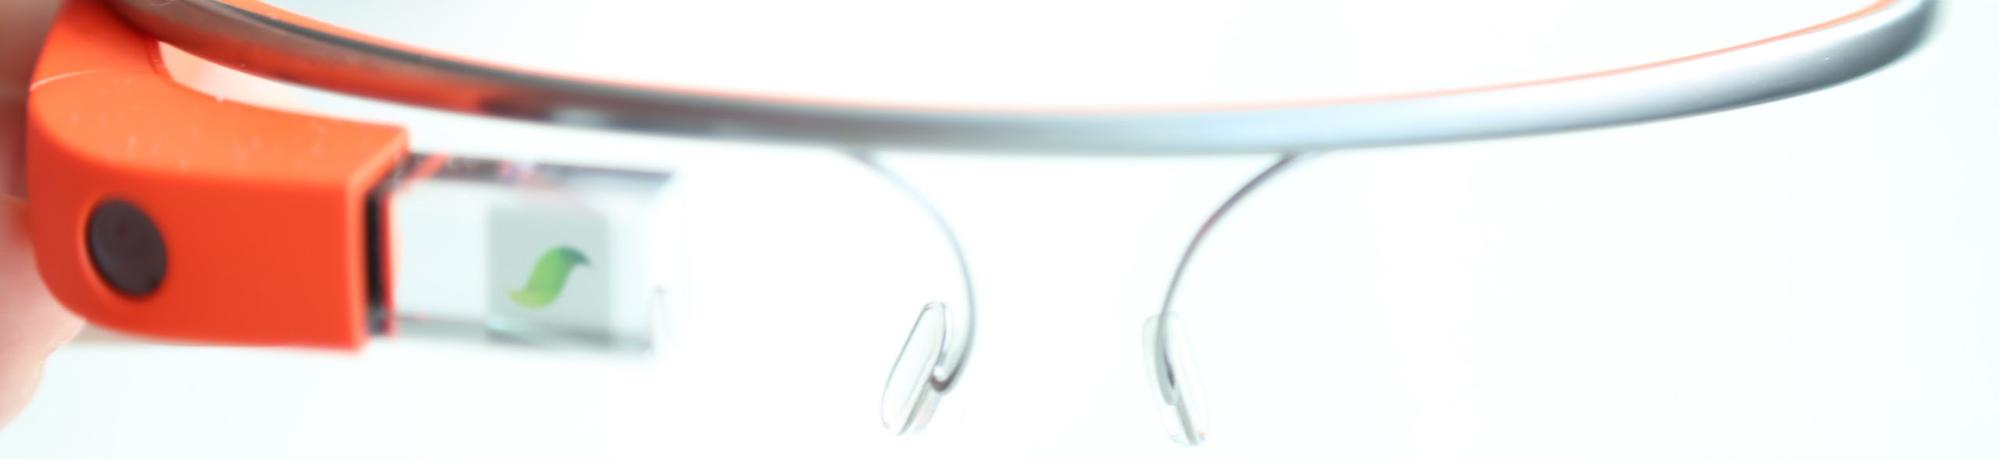
Wearable electronics have seen a boom over the last year. This is mainly due to the adoption of advanced watches that can do anything from answer phone calls to play games. Google feels they have the next big thing in wearable technology, and today we are going to take a look at how that will affect us as developers.
Currently in its explorer state, which is just a nice way of saying beta testing, Google Glass is far from achieving mass adoption. This makes it the perfect time to get involved in how this technology will be used, what it needs to be capable of and how it will shape the future of wearable electronics. Who knows if Google Glass will explode into the next big thing, but I think its pretty safe to say it is unlike anything we have right now. How we use it, what problems we can solve and the ways we can make peoples lives easier, better, safer and more entertaining is up to all of us.
At Sencha, we have always stuck by our core belief that HTML5, and the technologies that support it, will always the top choice for any cross-platform mobile development. Google Glass is a perfect example because you’ll quickly find that you don’t need anything more than Sencha Touch to build apps.
Building apps for Glass will come naturally to developers in the hybrid app world because we’re really just dealing with a smaller screen resolution and some new UI constraints. We understand these requirements since we support tablets, desktops and mobile phones.
Video Demo
Since most of you will not have access to Google Glass, we have put together a short video demo of a simple Sencha Touch app running on Glass.
Getting Started
You will start your application just like any other Sencha Touch app, scaffolding the basic skeleton with Sencha Cmd.
sencha -sdk /path/to/sdk generate app {AppName} /path/to/app
The next step will be to serve up this application, so we can work on it through the browser. Navigate to the folder where you created your application (/path/to/app) and run the following command.
sencha web start
You will now have a web server running your application, and you can visit http://localhost:54321 to check out the app.
Local Development Workflow
Now, let’s start looking into the Google Glass specifics. We will focus on Google Chrome as our local development platform since most people don’t have access to Glass. Later, however, we will dive into generating a native Google Glass application with Sencha Cmd and Cordova.
At this point, you should have your application open in Chrome, then select Tools → Developer Tools from the Menu on the top right. The shortcut for this is Command + Option + i. From the Developer Tools window, you will select the gear icon in the top right corner and choose the Overrides Section. You will confirm that “Show‘Emulation; view in console drawer” is checked. You can then close out of the setting menu.
Next, you will select any tab other than Console from the developer tools window. We will use Sources for now. At this point, you can press the ESC key on the keyboard to bring up the console drawer. Select the Emulation tab from the top to display all the overrides Chrome can apply.
If you navigate to the Device section, you will notice a drop down list of devices you can emulate, but Google Glass will not be one of them. I’m assuming in the future this option will be listed, but for now we need to set it up ourselves. Select a Google Nexus 4 from the drop down list and click emulate. We will now customize all of the settings.
In the Screen section, apply the following Settings:
- Resolution: 640×360
- Device pixel ratio: 1
- Font scale factor: 1
- Emulate Viewport should be checked
- Enable text autosizing should be checked
- Shrink to fit should be unchecked
- CSS Media should be unchecked
In the User Agent Section, apply the following settings:
- Spoof user agent should be checked
- Drop down should be set to “Other”
- Set the user agent to: Mozilla/5.0 (Linux; U; Android 4.0.4; en-us; Glass 1 Build/IMM76L; XE12) AppleWebKit/534.30 (KHTML, like Gecko) Version/4.0 Mobile Safari/534.30
In the Sensors section, you can enable any device sensor emulation you would like, but be sure to at least check “Emulate touch screen”.
You should not see your Sencha Touch application in a small 640×360 window inside of Chrome. This matches the view the user has overlayed on their eyes inside of Google Glass. I am not 100% sure these will be the final emulation settings, but I have tested with Glass myself looking through them at my screen, and the overlay matches the window in Chrome perfectly. This will definitely give you a great start into Google Glass development.
UI Notes
Now that we have everything up and running in Chrome, we can start developing our application. The UI for Glass is very simple since there is not much room for user input. I recommend starting with a Carousel as your primary navigation component. You can then use an ‘activeitemchange’ listener to determine which child is the main view. In Glass, you navigate around with swipes and select things with a tap, so normal application user flow would be something like:
- Application begins
- Users swipes to move the screen information that they need
- Users tap to get action options for that information
- Menu appears masking the original screen
- User swipes to move menu around to the option they require
- User taps to take action
You can find a lot more information on Google Glass UI on the Google Glass Developers UI Docs page.
Building Apps for Glass
Once you have completed your masterpiece and you are ready to bring it to the world of Glass explorers, you can rely on Sencha Cmd and its Cordova support to help. For more information on native packaging with Cordova, check out the Sencha Touch Cordova Guide, but we will cover the main points right now.
To add Cordova support to your application, make sure you have all the pre-reqs and run the following command from your application root. {AppID} should be a reverse domain descriptor for your application, for example com.sencha.glass.TestApp. {AppName} is optional and if not included will just default to the name of your Sencha Touch application. If you do wish to name your native application differently, you can pass it in here:
sencha cordova init {AppID} {AppName}
Open the cordova.local.properties file in the root of your project and set:
cordova.platforms=android
The next step is to add the Cordova plugins we have created to properly set up your application for Google Glass. To do this, navigate to {app-root}/cordova in your Terminal and run the following three commands.
cordova plugin add https://github.com/aphex/cordova-glass-core
cordova plugin add https://github.com/aphex/cordova-glass-touch
cordova plugin add https://github.com/aphex/cordova-glass-gesture
Plugin Notes
We will take a moment here to talk through what each of these plugins is providing for you.
cordova-glass-core: Modifies the Cordova Android project to properly run on Google Glass. This allows for configuration of the voice command that will open the application. It also, optionally, allows for voice prompts prior to your application launching and contains a JavaScript API to retrieve a string of what the user said. For example the “Launch Trigger” could be “open Sencha Movies” and the prompt could ask “What movie would you like to search for” — the JavaScript API would allow your application to get this information as soon as it opens.
cordova-glass-touch: This is a very simple plugin that dispatches touchstart and touchend events from the Google Glass touchpad on the webview. This allows the Sencha Touch event system to take over and manage all touch events as usual.
cordova-glass-gesture: This plugin is optional, but developers will likely want to use it in their application. Sencha Touch will automatically detect gestures from touch events. This is how it is built and will always work, but if a developer would like to get native gestures from the touchpad instead of Sencha Touch gestures, that ’s where this plugin comes in. It will dispatch all touchpad gestures on the webview document object. For more information on how to listen for these events, check out the README on this plugins GitHub repo.
Launch Customization
Now that you have added Glass support to your application, there is only one more customization that needs to happen. You first want want to add the Android platform to your Cordova project by running the following command from your {app-root}/cordova folder:
cordova add platform android
Next, open the file located at ‘{app-root}/cordova/platforms/android/values/glass.xml ’.
You will then find an element that looks like this:
<string name="app_launch_voice_trigger">hello cordova</string>
You can now modify the value “hello cordova” to any string you would like used to launch your application. Optionally, you will also find the element:
<string name="app_launch_voice_prompt">prompt question</string>
If you would like your application to prompt for user input prior to launching, you can change “prompt question” to any question you would like. In order to enable the prompt question, you will then need to open “{app-root}/cordova/platforms/android/xml/app_launch_voice_trigger.xml” and uncomment the line that says:
<input prompt="@string/app_launch_voice_prompt"/>
That should do it for the Glass configuration. We’re working actively with the Apache Cordova team to try to streamline this process more, but currently we’re unable to change these settings properly via a plugin. We hope to have this sorted out soon but in the meantime you will need to set them yourself, which also means if you remove this plugin and add it again you will need to clean up those changes and reset the strings. We’re thinking this will be a rare case though.
Building and Deploying
You can now build your application for Google Glass by running the following command from your application root:
sencha app build native
This will invoke Sencha Command Cordova Support and bundle your application up into a native Android apk file. You can find this file at {app-root}/cordova/platforms/android/bin/{AppName}-debug.apk. At this point, you can sideload this application onto Glass (if you own a pair) with the command:
adb install -r /path/to/{AppName}-debug.apk
Quick Tip
For those of you that would like to speed up Android device development, Sencha CMD allows for running an application in an emulator via the command:
sencha app build -run native
If you would rather install your application on a USB connected Android device (such as Google Glass), you can open the file “{app-root}/.sencha/app/cordova-impl.xml”and inside the “-cordova-emulate”target change the command from:
cordova emulate ${cordova.platforms.clean}
to
cordova run ${cordova.platforms.clean}
Now when you run a “sencha app build -run native”, the application will be installed on the attached device.
To the Future
We hope this information is helpful for developers trying to understand native Android packaging and those who want to push the boundaries of current technology and start making the applications of the future. We plan on being there with you, and we can ’t wait to see what you come up with, so please share your feedback in the comments. Thanks for tuning in.
Did you find the content helpful?
 0
0

 0
0

Latest Content
Introducing Rapid Ext JS: The Ultimate Low-Code Editor for Ext JS Development
We’re excited to announce the official release of Rapid Ext JS 1.0, a revolutionary low-code…
August 21, 2024
Sencha Architect 4.3.6 Has Arrived!
The Sencha team is pleased to announce the availability of Sencha Architect version 4.3.6. Building…
August 20, 2024

Introducing ReExt: A Game-Changer for React Developers
Sencha, a leader in JavaScript developer tools for building cross-platform and enterprise web applications, is…
August 20, 2024


