Full Stack Development with Ext JS 6.5 – Bookmarks for Spotify
Guest Blog Post
As an Ext JS consultant, I’m often on the road. During my travel time, I like to listen to audiobooks with Spotify. It has a huge collection of uncut audiobooks which is great. An audiobook normally consists of dozens to hundreds of tracks.
And sometimes, after a long day, I need some good music to calm down. Luckily, Spotify offers music as well, so I can easily switch to my favorite playlist.
The Problem
When I want to switch back to my audiobook, my progress position within the audiobook is lost, and I have to manually seek through the tracks to find the position where I left off (based on my memory). Spotify doesn’t offer a feature to bookmark a track position. Unsurprisingly, I’m not the only one with this problem. Looking at the Spotify community forums, there are many posts and comments from people who have the same problem. The feature request has been out there for more than two years.
The Solutions
Manually finding the right progress position every time you want to listen to an audiobook is very annoying. Typically, you would need three pieces of information:
- Album name
- Track name – audiobook track names normally contain a continuous number which only helps to sort them and listen to the tracks in the right order
- Track playback progress time
Currently, I know of at least three ways that users solve the problem.
- Before switching from your audiobook to a playlist, take a screenshot from Spotify. That screenshot contains all the information you need to find the right track again. I’ve done did that in the past.
- My wife used to delete all of the audiobook tracks from the album list that she had already listened to, so the next time she opened the audiobook album, she just had to start the first track in her list. This solution doesn’t save the tracks progress time.
- I’m a developer, so I developed an app to solve my problem.
The Application
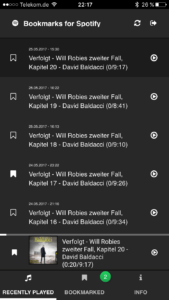
My solution is an Ext JS web app, Bookmarks for Spotify, which uses the Spotify Web API to access my Spotify track information.
Features
The app has the following features:
- Authentication for Spotify (auth / logout)
- Show the user’s currently playing track
- Show the user’s 50 recently played tracks
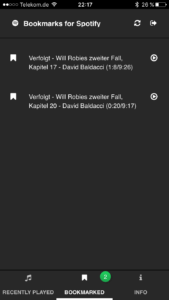
- Show the user’s bookmarked tracks
- Bookmark the currently playing track with time progress position
- Bookmark a recently played track
- Open Spotify and start playing a currently playing, recently played or bookmarked track. If the progress time is known, it jumps to that position and starts playing from there.
Architecture
My app runs on a Node.js server. The server-side application serves the Ext JS client application and provides services for the Ext JS app to communicate with the Spotify API. The Spotify API REST calls are done from the Node.js server app. The client app uses Ext JS 6.5 (the latest framework release), the modern toolkit, and is generated and built by Sencha Cmd. The custom theme was generated with Sencha Themer. I use therootcause.io for error tracking. For hosting, I created a docker image and run the docker container on sloppy.io. I use a set of npm scripts for the automated build and deploy process.
Technology Stack:
- Ext JS 6.5.0
- Node JS 7.8
- Spotify Web API
- Sencha Cmd 6.5.0.180
- Sencha Themer 1.2
- therootcause.io
- sloppy.io
- GIT
- Docker
- Docker Hub
- NPM Scripts
Sencha Cmd
I kick off the development by using Sencha Cmd to generate a Sencha workspace and my Spotify application.
sencha generate app -modern Spotify client/
During development, I use Sencha Cmd to solve all the file dependencies and generate bootstrap and styling files.
sencha app watch
My build.xml is extended to set the app.json version based on the version from package.json, and I set custom values through my index.html file. That allows me to manage the version number via npm in one place and use it for error tracking and display it in the app.
In app.json and index.html, placeholders are defined which will be replaced during the build.
Here is my app.json:
{
    ...
    /**
     * The version of the application.
     */
    "version": "@@@version@@@",
    ...
}
I hook into the “-after-init” target in build.xml to replace the placeholders with values from package.json and config.json.
Ext JS
The Ext JS app is based on the modern toolkit and is stored in the default folder structure generated by Sencha Cmd. It uses the MVC and MVVM patterns and ES6 code style, which is now supported by Sencha Cmd.
Formulas and Binding
Binding is used in several places. A common use case is for stores. Furthermore, it’s used in combination with view model formulas. In the example below, a formula in the view model checks if the auth token is set. Based on that information, {hasToken} and {!hasToken} login button or track list are shown or hidden.
Here is the View: view/main/Main.js
...
items: [
    {
        xtype: 'spotify-login',
        bind : {
            hidden: '{hasToken}'
        }
    },
    {
        xtype    : 'spotify-recentlyplayed',
        bind     : {
            hidden: '{!hasToken}',
            store : '{playedTracks}'
        },
        ...
Here is the ViewModel: view/main/MainModel.js
...
data: {
    token: ''
},

formulas: {
    // check if token is set
    hasToken: function (get) {
        return !(get('token') === '');
    }
},
...
In the CurrentTrackModel, a formula formats the current playback track progress and duration millisecond values to "mm:ss" time strings.
Here is the ViewModel: view/tracks/currenttrack/CurrentTrackModel.js
...
data    : {
    currentPlayback: null
},
formulas: {
    // format progress ms to "00:00"
    progress_ms: function (get) {
        const ms = get('currentPlayback.progress_ms');
        return parseInt(ms / 1000 / 60) + ":" + parseInt(ms / 1000 % 60);
    },
...
With Ext JS 6.5, it's now easy to listen to data changes in the view model within your view controller. By using the bindings config my onChangeToken method gets called. I used it to load the currently played track when the user logged in and the auth token is set.
Here is the ViewController: view/tracks/currenttrack/CurrentTrackController.js
...
bindings: {
    onChangeToken: {
        token: '{token}'
    }
},

/**
 * when token changes, trigger load of current playback
 *
 * @param data
 */
onChangeToken(data){
    if (data.token) {
        this.loadCurrentPlayback()
    }
},
...
You can even do mathematical operations with bindings. In my current playing track component, I use that feature to calculate the progress value of the progress bar.
Here is the View: view/tracks/currenttrack/CurrentTrack.js
{
    xtype: 'progress',
    bind: {
        value: '{currentPlayback.progress_ms / currentPlayback.item.duration_ms}',
    }
}
Custom List and Event Targets
The app contains two track lists. One for the recently played tracks and one for the bookmarked tracks. The look of the lists is the same, but the event actions are different. For that reason, I created an abstract list class that contains the list item XTemplate. The recently played tracks class and the bookmarked class extend my abstract list. Recently played tracks adds the pull to refresh plugin, while bookmarks just adds an empty list message. Both components are used in the main view and get different itemtap listeners attached.
Here is the View: view/tracks/List.js
...
itemTpl:
'' +

    // bookmark/ed icon -> trigger to bookmark or remove bookmark
    '' +

        // conditional bookmark icon rendering based on the bookmarked flag of the record
        '' +
    '' +

    // track infos
    '' +

        // date formatting
        '{played_at:date("d.m.Y - H:i")}' +
        '
 {name} - {artist} ({progress_ms_display}/{duration_ms_display})' +
    '' +

    // play icon -> trigger for playback
    '' +
        '' +
    '' +

''
...
I have two actions, bookmark and play for every list item, but only one itemtap event to handle both. Inside of the view controllers, I have to decide which target of the item was tapped. I can do this with the getTarget() method of the itemtap listeners event object. It checks if a dom element with a given css class was tapped.
Here is the ViewController: view/main/MainController.js
...
onItemTap(grid, index, target, record, e) {

    if (e.getTarget('.track-bookmark')) {
        // bookmark track
    }

    if (e.getTarget('.track-play')) {
        // start playback track
    }
},
...
You can see that those are the CSS classes from the list XTemplate.
Custom Events
The app has three components with a play track trigger. I use custom events to fire the information about the track to play from the components view controller.
Here is the ViewController: view/tracks/currenttrack/CurrentTrackController.js
...
playCurrentTrack() {
    const vm = this.getViewModel();
    this.fireEvent('playCurrentTrack', vm.get('currentPlayback'));
}
...
In the main view controller, listeners are configured to dispatch the events and trigger the tracks playback.
Here is the ViewController: view/main/MainController.js
...
listen: {
    controller: {
        '*': {
            bookmarkCurrentTrack: 'onBookmarkCurrentTrack',
            playCurrentTrack    : 'onPlayCurrentTrack'
        }
    }
},
...
Local Storage
Some app data has to persist in order to use it across the user’s sessions. Bookmarked tracks is one of them. The user likes to have his bookmarks the next time he opens or refreshes the web app. The bookmarked store uses the localstorage proxy to persist the data in localstorage.
Here is the ViewModel: view/main/MainModel.js
...
bookmarked  : {
    autoLoad: true,
    storeId : 'bookmarked',
    model   : 'Spotify.model.BookmarkedTrack',
    proxy   : {
        type: 'localstorage',
        id  : 'bookmarked-tracks'
    }
}
...
The user’s Spotify auth token is also persisted in localstorage to prevent a login after every app refresh.
Display App Version
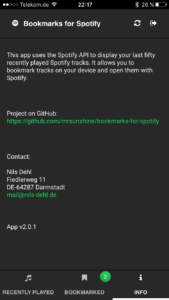
In my Ext JS apps, I always like to display the app version number from the app.json file. I use it to verify which version runs on which stage, or users can use it to give feedback. In the Bookmarks for Spotify App, you can find the version number in the info view. You just have to show Ext.manifest.version somewhere in your app.
{
    xtype  : 'container',
    html   : 'App v' + Ext.manifest.version
}
Sencha Themer
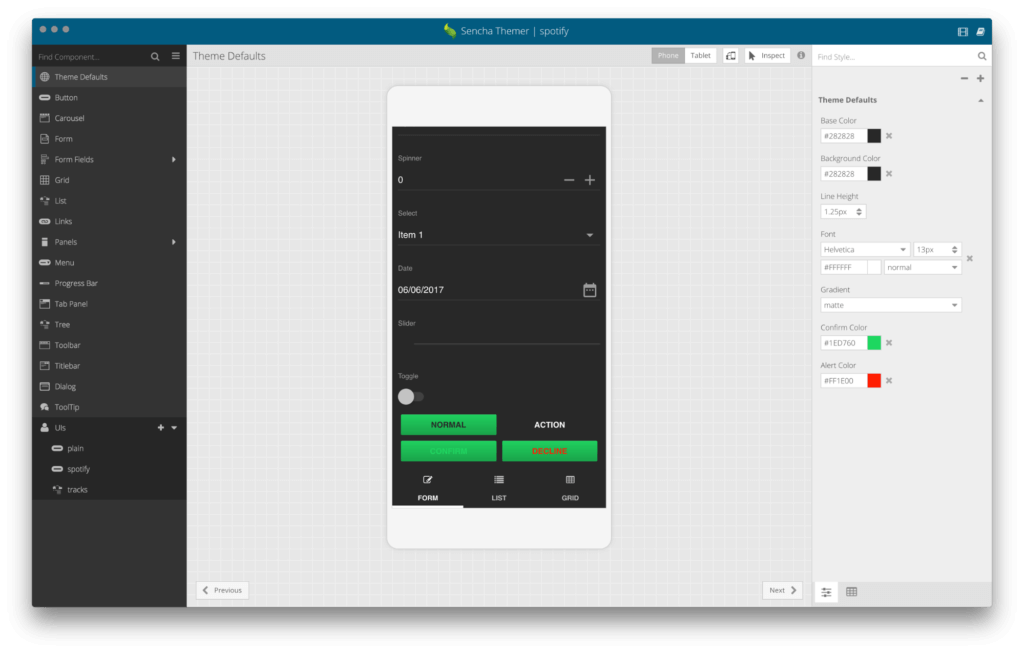
With Sencha Themer, I created an Ext JS Theme package based on the modern Material design theme and applied it to my app.
Publish > Apply Theme to App(s)...
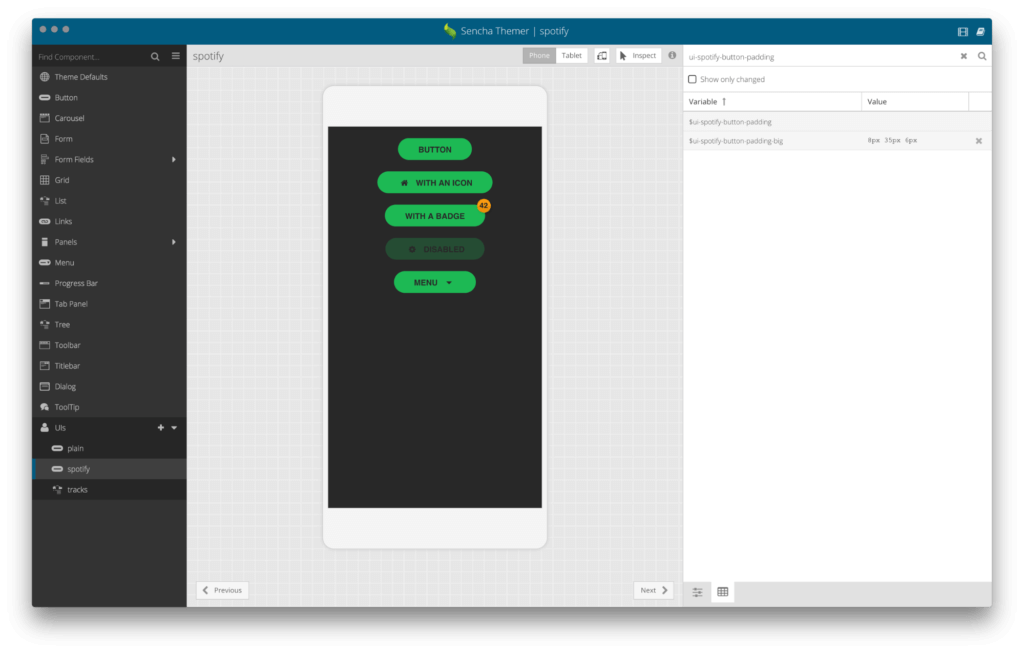
Starting with the $base-color, I adjusted the colors and sizing for the components used by my app to give it a Spotify look. You can easily customize your theme through the Sencha Themer user interface by changing the theme variables.
Spotify UI Button
I created custom UIs for special styling, for example, the "Spotify UI" which is used by the Spotify login button. Sometimes you need to switch to the "Sass Variable" view in Sencha Themer to change variables. In the image below, you can see that I did that to change the value of $ui-spotify-button-padding-big.
In your Ext JS code, you can use your custom UIs by using the ui config.
{
    xtype  : 'button',
    ui     : 'spotify',
    iconCls: 'x-fa fa-spotify',
    text   : 'Login with Spotify',
    handler: 'onSpotifyLogin',
    width  : 280
}
Font Awesome
For the Spotify login button and other places in the app, I used font icons. In the code above, you can see that the iconCls uses Font Awesome to set the Spotify icon. To use Font Awesome in your app, you have to require the "font-awesome" package in your app.json file. Search on http://fontawesome.io/icons/ for the icon you need and use the displayed Font Awesome class name combined with x-fa in your code. For example:
iconCls: 'x-fa fa-spotify'
Styling Custom Components
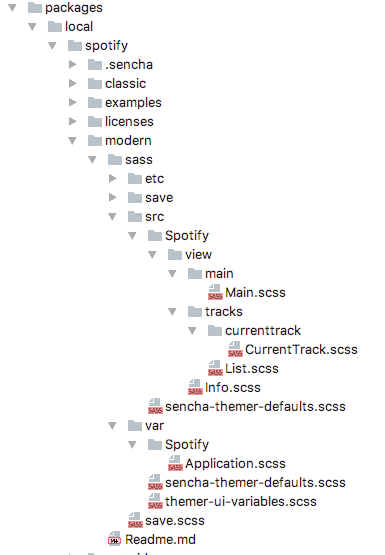
There’s also some custom SCSS styling in the theme package for my custom components and CSS classes. If no namespace is set in your package.json, you can organize the SCSS to fit in your Ext JS components structure.
So, the styling for my current track Ext JS component with the class name Spotify.view.tracks.currenttrack.CurrentTrack path:
/bookmarks-for-spotify/client/app/view/tracks/currenttrack/CurrentTrack.js
can be found in:
/bookmarks-for-spotify/client/packages/local/spotify/modern/sass/src/Spotify/view/tracks/currenttrack/CurrentTrack.scss
and you can see that
.../view/tracks/currenttrack/CurrentTrack.js
matches to
.../view/tracks/currenttrack/CurrentTrack.scss
Build / Deploy / Run
At dkd where I work, we have complex continuous integration and continuous deployment processes (CI/CD) to push apps or websites to production. We use tools like Phabricator, Jenkins, and Platform.sh. Inspired by those processes, I wanted an easy and automated way to build, deploy, and run my app.
My process looks like this:
- Set the app version – package.json via npm
- Ext JS app production build – via Sencha Cmd
- Create git tag and push version to origin – via git
- Create docker image – via docker build
- Push docker image to docker hub – via docker push
- Run app on sloppy.io – via sloppy.io cli
I came up with a set of npm scripts that do all this work and get triggered by just one command:
APP_VERSION=2.3.0 DOMAIN=bookmarks-for-spotify.ws4.be DOCKERHUB_REPOSITORY=mrsunshine/spotify-recently-played-tracks npm run deploy:prod
Conclusion
Using the Ext JS framework and Sencha tools helped me to solve my problem with ease. You can find the project code on GitHub.
I'm happy to share my app Bookmarks for Spotify with you. I use it every day listening to and switching between Spotify audiobooks and music playlists. I hope it will help you as well!

We’re excited to announce the official release of Rapid Ext JS 1.0, a revolutionary low-code…

The Sencha team is pleased to announce the availability of Sencha Architect version 4.3.6. Building…

Sencha, a leader in JavaScript developer tools for building cross-platform and enterprise web applications, is…


