


Sencha.io Photo Sharing Example Using Sencha Touch
July 12, 2012
137 Views
The Sencha.io photo sharing example shows you how to use Sencha.io, the Sencha cloud service, with your Sencha Touch 2 mobile apps. The app consists of two modules:
- The photo module allows a user to manage photos that are synced to all of the user’s devices.
- By using the share module, users can share their images with all other app users.
- It uses Sencha.io services: user, data, channel, src and a path like menu
Before we have a look at how the services are used in the app, let’s start with an introduction to Sencha.io.
Introduction to Sencha.io
The Sencha.io platform provides cloud services for your Sencha Touch mobile applications. Currently, you can use the following services:
- The User services provide a set of APIs for the user registration and login function. Login data is stored in the cloud.
- Data synchronizes local data with the cloud. Users always have access to app data even when the network is not available. They can share the data between their devices or with other users.
- The channel services let users send and receive messages. The service enables reliable one-to-one as well as one-to-many messaging.
- Deployment provides version-management, management-tools, user-management-services, and app delivery through the Sencha app repository, Senchafy.com.
- Src dynamically resizes images for mobile screen sizes.
How to start using Sencha.io:
- Log in on http://sencha.io
- Download the SDK at http://download.sencha.io/
- Read the guides and documentation at http://docs.sencha.io/
- Create an app and user group on http://sencha.io
Now, lets get our hands dirty by digging into the example app’s code, and let’s see how to integrate Sencha.io.
Setup
 Start to create a new Sencha Touch 2 app using the Sencha SDK command line tool.
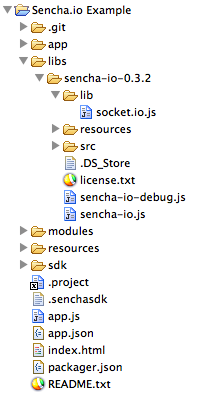
Download the Sencha.io SDK http://download.sencha.io/ and add it to your app’s libs-folder. The SDK also includes the socket.io.js library which is needed for websocket communication.
Create a User Group and App on Sencha.io
Log in to Sencha.io and create a new user group.
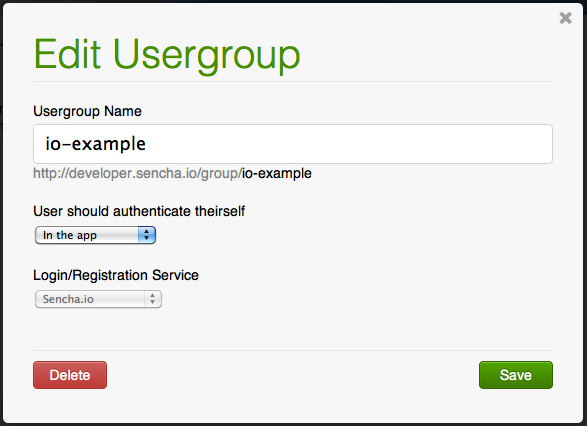
We use the in-app-authentication with the Sencha.io login and registration services. That’s good for getting started because it’s well integrated in the SDK and already gives you all the necessary authentication views.
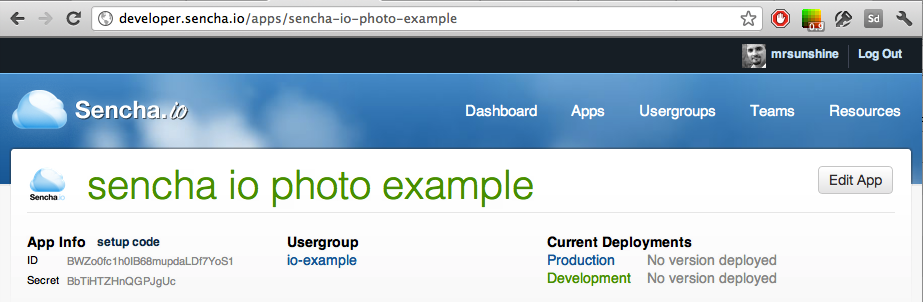
Then, create a new app and select the user group you just created. Note down or copy and paste the app-ID and secret key, since you’re going to need them in a minute.
Application setup
The starting point of the app is the app.js file. Here, we’ll add the loading information for the Sencha.io namespaces into the loader config.
app.js
Ext.Loader.setPath({
‘Ext.io’: ‘libs/sencha-io-0.3.3/src/io’,
‘Ext.cf’: ‘libs/sencha-io-0.3.3/src/cf’,
‘Ext’: ‘sdk/src’,
‘Ux’ : ‘libs/Ux’,
‘PathMenu’: ‘modules/PathMenu’,
‘Share’: ‘modules/Share’,
‘Photos’: ‘modules/Photos’
});
Ext.application({
name: ‘IoExample’,
controllers: [
//include Ext.io.Controller to manage the sencha.io connection
‘Ext.io.Controller’,
// Controller for the main application
‘Application’,
// Controller of the module to manage photos
‘Photos.controller.Photos’,
// Controller of the module for sharing images between users
‘Share.controller.Share’,
// Controller for the path menu
‘PathMenu.controller.Menu’
],
/** Add sencha.io app configuration.
*/
config: {
io: {
// app id string configured on http://developer.sencha.io/apps
appId: ‘BWZo0fc1h0IB68mupdaLDf7YoS1’,
// app secret
appSecret: ‘BbTiHTZHnQGPJgUc’,
// logging level. Should be one of “none”, “debug”, “info”, “warn” or “error”. Defaults to “error”.
logLevel: ‘error’,
// If you don’t want to attempt to authenticate on startup set this to false. defaults to true
authOnStartup: true,
// If you don’t want to automatically trigger the login panel when your application starts then set manualLogin to true
manualLogin: true
}
}
…
});
Add the app and modules controllers into the controller configuration. Also, the Ext.io.Controller is needed, which manages the Sencha.io connection.
Now, we can add the Sencha.io config to the application config object that is used to setup Sencha.io. Next, the app ID and secret key is needed, that we noted before. You can also set the log level to debug; it can be helpful to watch the browser’s console (console.log()) to see what happens in the background while developing.
In the app.json JavaScript asset part, we add the path to load socket.io.
app.json
{
“name”: “IoExample”,
“js”: [
{
“path”: “libs/sencha-io-0.3.2/lib/socket.io.js”
},
{
“path”: “sdk/sencha-touch.js”
},
{
“path”: “app.js”,
“bundle”: true,
“update”: “delta”
}
],
…
}
Having set up the app, we can now have a look at the login.
Login
By default, authentication on app startup is activated and shows a login and register view.
This view is part of Sencha.io. You can use your own view by changing the Sencha.io’s controller configuration. The general authentication behavior can be configured within the Sencha.io configuration in Ext.application.
Users have to register themselves with the app the first time.


After that, they can use their credentials to log into the app on any of their devices. As you see, using the login service is quite easy. Next, we are going to use the data service.
Sync Photos Between User Devices
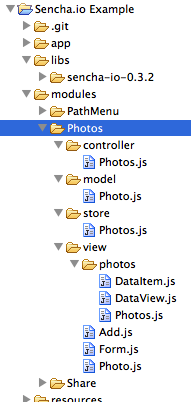
We will now push photos to a cloud store and sync them between our devices. To achieve this, we will build a photos module.
The module consists of three views which are: model, store and controller.
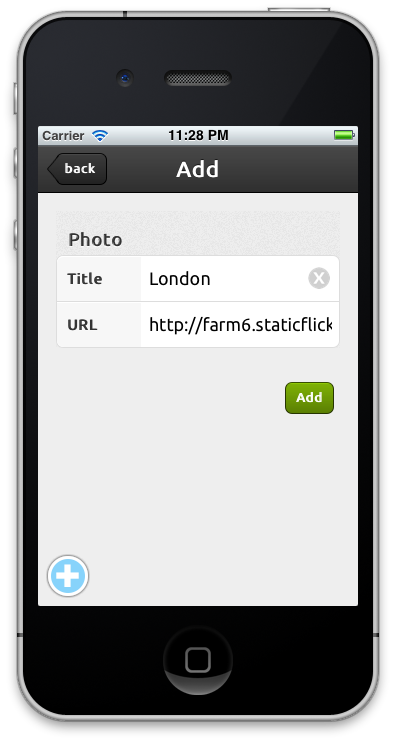

- The photo add view is a form panel which allows adding new photo records including title and image URL to the photo store.
- The photos dataview is bound to the photos store and displays all items.
- The photo detail view shows a single photo and allows it to share it.
- The model describes the photo records that we’re going to store in a syncstore.
- Finally the controller controls the photos module.
Sync Store
Sencha.io comes with a syncstorage. It stores the data in the localStorage of the browser and replicates the data into the cloud, if online.
It can also be used offline and then syncs changes when the user has an online connection again. The syncstore can be used with the following user access configuration:
- one user – one device
- one user – many devices
- many users – many devices
We would like to keep all photos of one user in sync on all of his devices.
That’s why we configure the photos store to “one user – many devices”. All needed configurations take place in the proxy configuration.
The proxy type is ‘syncstorage’, owner is ‘user’ and access is ‘private’.
modules/Photos/store/Photos.js
Ext.define(‘Photos.store.Photos’, {
extend: ‘Ext.data.Store’,
requires: [‘Photos.model.Photo’],
config: {
model: ‘Photos.model.Photo’,
storeId: ‘photos’,
proxy: {
type: ‘syncstorage’,
id: ‘photos’,
owner: ‘user’,
access: ‘private’
},
autoLoad: true,
autoSync: false
}
});
Photos Controller
Let’s start looking into the init method of the controller.
That’s the place where we register listeners for Sencha.io events. The Sencha.io controller is easily accessible via this.getApplication().sio.
modules/Photos/controller/Photos.js
init: function() {
this.getApplication().sio.on({
authorized: this.onLogin,
usermessage: this.onUserMessage
scope: this
});
},
If the user logs into the app, we make sure that the store is up to date and it syncs itself with the cloud.
modules/Photos/controller/Photos.js
onLogin: function(user) {
Ext.getStore(‘photos’).sync();
},
If a user adds a new photo in the add view, the addPhoto method will be called.
modules/Photos/controller/Photos.js
addPhoto: function(button) {
var form = button.up(‘formpanel’),
values = form.getValues(),
store = Ext.getStore(‘photos’);
store.add(values);
store.sync();
form.reset();
Ext.io.User.getCurrent(
function(user, error) {
if (user) {
user.send({message:’update-photos’}, function() {});
}
}
);
this.redirectTo(‘photo-list’);
},
It adds the new record to the store and syncs it.
To keep all of the user’s devices in sync, we do send an ‘update-photos’ message to the user.
In general, it’s important to have a sync strategy for your stores because store changes are only synchronized to localStorage, and in the cloud if the store’s “sync” method is called.
For example, we should call the sync if:
- a change in a store occurs, as when adding a new record
- the user triggers a refresh
- a broadcasted update notification message is received
That is when the onUserMessage method is called.
modules/Photos/controller/Photos.js
onUserMessage: function(sender, message, eOpts) {
var senderUserId = sender.getUserId();
if (message === ‘update-photos’) {
Ext.io.User.getCurrent(
function(user, error) {
if (user.getId() === senderUserId) {
Ext.getStore(‘photos’).sync();
}
}
);
}
},
It checks to see if the message indicates a new photo has been added ‘update-photos’ on a device of the same user, and if so, syncs the store.
Now that we have the photos, let’s share them!
Share Photos with Users
We can now look at sharing a user’s photo with all users using the app. Here is what the share module does:
This module has a public store which is accessible to all app users.
modules/Share/store/SharedItems.js
Ext.define(‘Share.store.SharedItems’, {
extend: ‘Ext.data.Store’,
requires: [
‘Share.model.Item’
],
config: {
model: ‘Share.model.Item’,
storeId: ‘shareditems’,
sorters: [
{
property : ‘date’,
direction: ‘DESC’
}
],
proxy: {
type: ‘syncstorage’,
id: ‘shareditems’,
access:’public’
},
autoLoad: true,
autoSync: false
}
});
It is bound to the shared item list view, which shows the shared photos in a sorting with the most recent photo on top; next to the photo is the gravatar of the user who shared the photo.


We will take a closer look at the view in the next section. Let’s first see how the controller broadcasts the photos using Sencha.io.
Share controller
As with the photos controller, we add the Sencha.io event-listener into the init method and onLogin sync the store.
We also create / subscribe to a Sencha.io message channel which we will use to broadcast information about new, shared photos.
modules/Share/contoller/Share.js
config: {
…
user: null,
channel: null
},
init: function() {
this.getApplication().sio.on({
authorized: this.onLogin,
scope: this
});
},
onLogin: function(user) {
this.setUser(user);
Ext.getStore(‘shareditems’).sync();
/** get / create channel with the name “share-images”
* subscribe to channel
*/
Ext.io.Channel.get(
{
name: ‘share-images’
},
this.subscribeToChannel,
this
);
},
subscribeToChannel: function(channel) {
// save reference to the channel to use it for later publishments
this.setChannel(channel);
channel.subscribe(this.onNewSharedImage, this);
},
If a user taps on the share button in the photo detail view, the photo data, the md5 hash of the user’s email address and a timestamp are used as the new record for the “shareditems” store.
The md5 hash is used later to get the user’s gravatar image and the timestamp for sorting the store.
After adding the record to the store, we synchronize it. Sencha.io allows you to add a callback function to the sync method.
We wait for the sync callback to make sure the record was synced to the cloud.
Finally, we publish a ‘new image’ message to the ‘share-images’ channel.
modules/Share/contoller/Share.js
shareImage: function(data) {
var store = Ext.getStore(‘shareditems’),
me = this,
record = {
from: Ext.cf.util.Md5.hash(this.getUser().getData().email),
imageurl: data.url,
date: Ext.Date.format(new Date(), ‘U’)
};
store.add(record);
store.sync(function(){
me.publishNewImageMessage();
});
},
publishNewImageMessage: function() {
this.getChannel().publish({message: ‘new image’},Ext.emptyFn , this);
},
Because we already subscribed to the channel ‘new image’, messages get received and the onNewSharedImage method is triggered.
onNewSharedImage: function(message) {
Ext.getStore(‘shareditems’).sync();
},
It syncs the store and with that refreshes the shared image list view. Let’s now look at how the images are rendered with the src service.
Resize images with src.sencha.io
With the src service, we can easily re-size the original images for mobile use.
We can use src service by building an url like this:
- http://src.sencha.io/320/200/http://sencha.com/files/u.jpg
- http://src.sencha.io/ + size + the url to your image source.
In the app, we use it in all image displaying views, like in the photo share list item template.
modules/Share/view/List.js
itemTpl: ‘
‘ +
‘ ‘ +
‘ +
‘
‘
‘ +‘
‘ +
‘
‘ +
‘ ‘ +
‘ +
‘
‘
‘
‘ +
‘
‘,
To learn about all src image re-size options, take a look at the src guide
Conclusion
Sencha.io is great for enriching your apps with cloud services. Users can sync all of their devices. You can even build multi-user apps easily like chat, games or social networks, just as we did with our photo sharing example.
Did you find the content helpful?
 0
0

 0
0

Latest Content

Introducing Rapid Ext JS: The Ultimate Low-Code Editor for Ext JS Development
We’re excited to announce the official release of Rapid Ext JS 1.0, a revolutionary low-code…
August 21, 2024

Sencha Architect 4.3.6 Has Arrived!
The Sencha team is pleased to announce the availability of Sencha Architect version 4.3.6. Building…
August 20, 2024

Introducing ReExt: A Game-Changer for React Developers
Sencha, a leader in JavaScript developer tools for building cross-platform and enterprise web applications, is…
August 20, 2024


