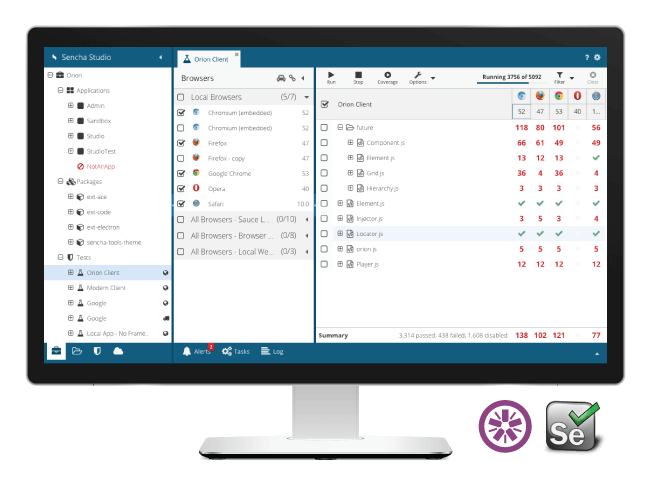
Sencha Test 2.1 is Now Generally Available

Sencha Test 2.1 is now generally available, and I’m excited to share with you all of the amazing features that we have added to the product. Existing customers can download the latest version from the Sencha support portal, and new customers can obtain a copy of the trial version.
Download Now
- Sencha Test customers: download from the Support portal
- Download a 30-day free trial of Sencha Test
- Read the guides and documentation
- Check out the examples
Upcoming Webinar
Join us for our upcoming webinar where you’ll learn about the key capabilities of Sencha Test 2.1.
What’s New in Sencha Test 2.1
Date: Tuesday, 5/23/17
Time: 10am PT |1pm ET | 6pm BST
Who Should Attend:
- Development Managers and Developers
- QA Managers and Test Automation Engineers
- Anyone interested in delivering high quality Ext JS apps faster
What’s New
Sencha Test 2.1 has new features, which greatly enhance your experience of creating tests, managing defects and storing test results. New features in this release include:
- Inspect components and elements on Ext JS applications
- Execute tests from Sencha Studio and store test results on the local archive server
- Add external files or install npm modules and simply require them in test code
- Analyze test failures and publish bugs directly to JIRA
- Perform visual testing directly from Sencha Studio
Test Automation is a Journey
We believe that test automation is a journey, which needs to be carefully planned, executed, and maintained. Even rockstar engineers who create automated tests have to periodically update or change the test code to meet the latest requirements. While planning a journey, one needs to consider many things such as the route, break times, food, hotels, etc. Similarly, in a test automation project, teams need to decide why automated testing is needed, what the benefits are, and finally how they’re going to achieve their goals. Also, before they put pen to paper, they have to spell out the strategy, data requirements, infrastructure requirements, and finally, the organization of the automated tests.
Starting Point: Test Design
Once you’ve figured out why you’re embarking on the journey and what the benefits are, it’s time to think about how you’re going to accomplish your goals. We believe that test design is a great place to start thinking about test automation. Test design is a process of defining the whole process including organizing tests, data requirements, infrastructure setup, and last but not least, how to create tests that are maintainable in the long run.
In Sencha Test 2.1, we’ve created features that let you manage many aspects of the design process directly in the product.
Inspector
A critical aspect of test writing is the ability to locate components and/or elements of an application. Inspector helps you derive meaningful locators from elements on the web page. Anyone who has written automated scripts knows the importance of a locator. If you consider a simple scenario where you have to enter a value in a text field, you’ll see the significance of a good locator. For the text field on this page, we assign a default id of “@textfield-1143”. Now, Ext JS is a highly componentized framework, so we can use the component query instead of the id. The component query for the subject text field is “textfield[fieldLabel=”Subject”]”. When considering the ‘id’ and the ‘component query’, the ‘component query’ is more stable as it relies on the unique identity of the component as opposed to a dynamically generated value. xtype or itemid are unique names or values provided by developers to various components used in the application. Using the xtype values in combination with the properties (the label of the text field in the above example) allows a user to create a stable locator that isn’t affected unless it’s explicitly changed by developers. That’s the importance of a good locator.
Inspector – Wizard of Locators
Now, the Inspector feature in this release does more than fetch a good locator. It offers multiple choices to create a stable locator. Also, it allows you to add more properties to target a single component among similar components on a web page. The wizard shows many component properties, and the user can keep adding as many conditions as needed until the locator finds one item.
Inspector – Test Code
Alright, you got the locators so now what? The Inspector gives you multiple options at this point. The locators along with component type can just be inserted as API code into the test or can be saved as page objects. We’ll talk about page objects below. The insert API code option will generate test code using appropriate Sencha Test APIs. For example, in the locators screen, there will be four lines of test code generated based on the future type indicated in the grid.
Page Objects
Page Objects are a concept that has simplified the web test automation process for thousands of developers and without it there would be no way of maintaining test scripts in the long run. There are many different ways page objects can be set up and used. SeleniumHQ has excellent documentation on this topic. The idea is very simple. You create functions or objects of all the components on a page in the application under test. You reuse them in multiple tests by instantiating the objects when needed. This means you can avoid having to copy and paste a locator on multiple test cases, which minimizes the need to modify the locator value when the developer changes the label from Subject to something fancy.
The saved page objects can then be modified either by using Inspector or by manually editing the code. This makes it easy to update things that we know for sure without having to go through the inspecting process. The page objects follow a simple syntax that can be leveraged to create additional functions or objects on the same page.
Inspector – API Code vs. Page Objects
At this point, you can either use the API code or the page object code directly in your test. The API code is useful if you want to create custom page objects, or if you want to understand how the APIs work. Inserting a page object option is great because all the heavy lifting is done by Sencha Test, and you can just think about how the test should be structured. Page object code helps you keep your test clean and devoid of locator values that make test code unreadable. The Futures API along with an API value is hidden away under the page object nodes in Sencha Studio and will be made available at the time of test execution. If a developer gets creative and changes the locators, the modification will resort to just one location as opposed to multiple tests.
External Libraries
Support for external libraries allows users to extend Sencha Test beyond Ext JS apps. With a node module available for almost any specific task, we now provide a way to simply require these libraries in your test code within a WebDriver scenario. It can be anything from connecting to your database to making a web service call.
If you want to reuse a simple class or a function across all the tests, it’s now possible to add it to the “libs” folder and require it as part of the test code.
Local Archive Server
Sencha Studio allows users to create, debug, and run tests on multiple browsers simultaneously. Sencha Test currently features a node-based archive server that allows CI tools to save test runs. Even though we recommend using a CI system to kick off tests, it’s not always a reality. Maintaining continuous integration systems requires separate machines and testers. Many smaller teams that are building tests don’t have a CI process in place. Users who want to save test results have had to use the Sencha Test command line utility.
In this release, you can now store manual test runs in a local archive server and use them to analyze test results. The server gives access to prior test runs, which is important for small teams that don’t have a CI system set up and are kicking off tests manually. The local archive server also allows users to publish tests directly into JIRA after reviewing failed tests.
Take Screenshots of Tests from Sencha Studio
Having the local server enables you to perform a screenshot comparison from Sencha Studio. Visual validation of page rendition on multiple browsers is a critical aspect of web application testing. Screen comparison tests can be executed out of the box in Sencha Studio using the WebDriver scenario. It can be used with the in-browser scenario by running the tests on a remote Selenium farm or browser vendor.
ALM Integration
Our goal is to help customers achieve continuous testing. This goal can’t be achieved unless the test failures are captured, and the defects are managed with minimal human intervention. We’ve embarked on the journey of supporting end-to-end automation from kicking off runs using a CI tool to logging bugs in a defect tracking tool.
In this release, we’ve integrated with JIRA, a popular issue tracking product among our customers. Defect triage is a very important process in an organization, and when the QA team logs legitimate bugs, the triage becomes all the more efficient. The integration was done by including a local archive server. The local server saves the manual test runs, and the failures can be reviewed on a screen within Sencha Studio; then, defects can be published directly to the JIRA project. A one-time setup gives users access to all the eligible JIRA projects within the organization, and users have an option to change the project based on tests executed on the review screen. Users are also able to ignore false negatives. Sencha Studio communicates with JIRA to get the latest status on bugs. During bug review, the user can select appropriate actions to not duplicate an already open bug. In addition, the JIRA integration will also work with a CI test run and existing remote archive server configuration.
Learn More and Share Your Feedback
Sencha Test 2.1 lets you create tests simply by inspecting components on a web page and allows you to achieve an end-to-end automated workflow from unattended execution using CI tools to logging defects on JIRA. The flexibility of including external files opens up endless possibilities for testing outside of the application. With the help of a local archive server, Sencha Test ensures that manual test runs are retained for analysis and defect management.
Sencha Test 2.1 is generally available for download immediately from the Support portal (for Sencha Test customers) and for a 30-day free trial. Try out Sencha Test with one of your apps and use our Sencha Test examples to get started. Register for our upcoming webinar, What’s New in Sencha Test 2.1.
Share your feedback and report bugs in the Sencha Test forum. We look forward to your comments.

We’re excited to announce the official release of Rapid Ext JS 1.0, a revolutionary low-code…

The Sencha team is pleased to announce the availability of Sencha Architect version 4.3.6. Building…

Sencha, a leader in JavaScript developer tools for building cross-platform and enterprise web applications, is…


