Using the Touch Scheduler Component

Guest Blog Post
At Bryntum, we have been working hard lately to port our Ext Scheduler component over to the Sencha Touch platform. In this post, I’ll introduce you to the new version and share some details of how we developed a cross framework extension for Sencha Touch and Ext JS.
What is the Touch Scheduler?
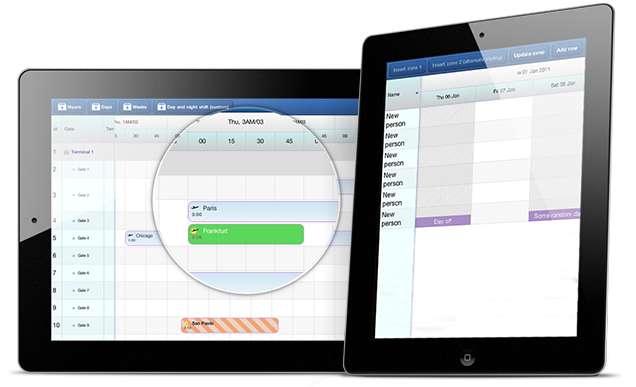
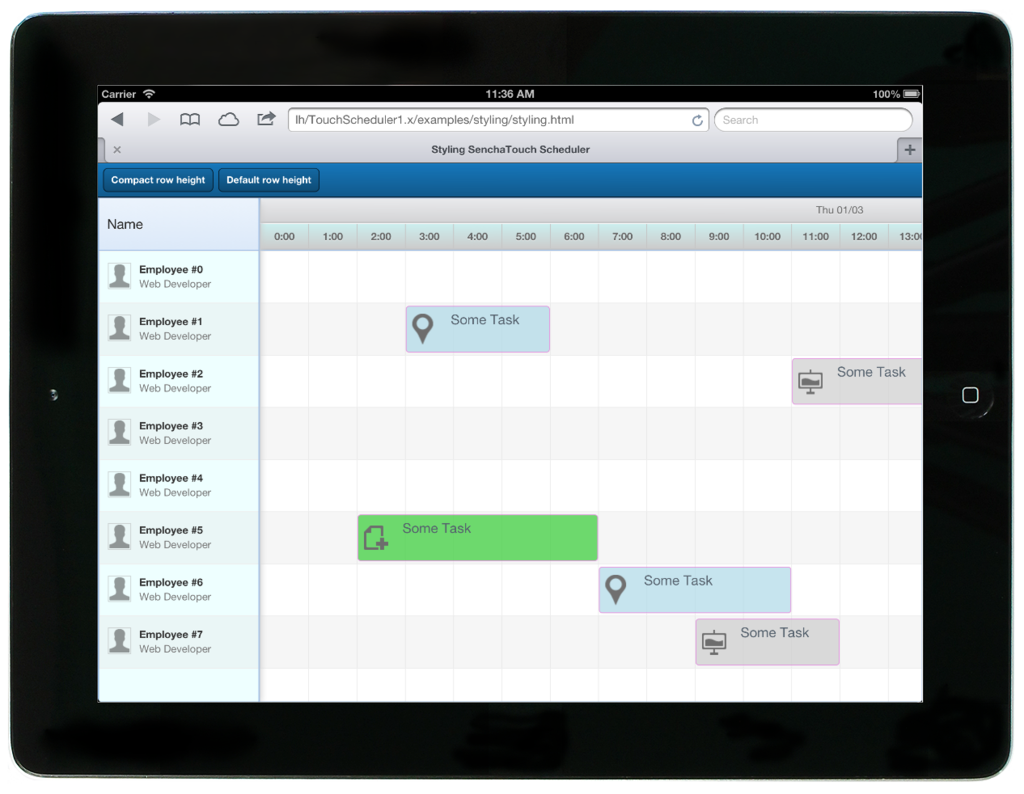
The Touch Scheduler is a mobile planning component offering rich interactivity for anyone looking to schedule their resources, tasks or appointments. In the schedule, you can tap and drag task bars and also pinch to resize them. You can even interact with the underlying schedule area to change row height or zoom level easily. Since the component is fully built on Sencha Touch, it is very easy to combine with other UI components in the framework such as forms or lists. Below is a screenshot of one of the examples.
A look at the requirements
First of all, to build a grid-based scheduling component, you need some type of grid component to use as the base. The grid needs to support at least locked columns, sorting and variable row height. A grid component targeted at mobile and tablet devices must also support buffered rendering to keep the DOM footprint as small as possible. We started by developing a custom Sencha Touch grid (codename “UberGrid”, to be released soon) with buffering support as well as support for any number of scrollable ‘locked’ sections. This gave us a good foundation as we continued to implement the scheduling specific code portions.
Our goal was to be able to reuse as much of the scheduling logic and Model/Store code from the Ext JS version as possible. This turned out to be quite doable after a few rounds of refactoring which also helped us clean up our code base. For our 1.0 version, we managed to reuse about 7000 lines of code between the Ext JS and Sencha Touch versions. The underlying grid is about 5000 lines, and we only had to write 2000 lines of Sencha Touch specific code (mainly UI code handling the touch interaction). The big advantage of this code sharing, is of course is that we avoided duplicating lots of code. The drawback is that the shared code is harder to maintain and requires extra documentation and test coverage. For example, to get the DOM element of a component, in Ext JS we use the “getEl” method, and in Sencha Touch we use the “element” property. To workaround this, we have created some additional normalization methods which are overridden for the mobile platform, and performs the correct action, see an example of this below:
getSchedulingEl : function () {
return this.getEl();
}
// Sencha Touch version, overrides parent method
getSchedulingEl : function () {
return this.element;
}
Hello world
If you’re already familiar with the Ext Scheduler or other Sencha Touch components, implementing the Touch Scheduler should feel very familiar. To get it up and running, you simply create two stores for the resources and events and plug those stores into the component. Below is a simple script that renders a basic scheduler:
onReady : function () {
var resourceStore = new Sch.data.ResourceStore({
data : [
{ Id : 1, Name : ‘Mike’ }
]
})
var eventStore = new Sch.data.EventStore({
data : [
{
Id : 1,
ResourceId : 1,
Name : ‘Some task’,
StartDate : ‘2013-01-01’,
EndDate : ‘2013-01-03’
}
]
});
var scheduler = new Sch.panel.SchedulerGrid({
viewPreset : ‘hourAndDay’,
startDate : new Date(2013, 0, 1),
endDate : new Date(2013, 0, 3),
rowHeight : 65,
barMargin : 3,
resourceStore : resourceStore,
eventStore : eventStore,
eventRenderer : function (event) {
return event.getName();
},
columns : [
{
header : ‘Name’,
dataIndex : ‘Name’,
width : 200
}
]
});
Ext.Viewport.add(scheduler);
}
});
To learn about additional config options for the panel or stores, there is API documentation available, powered by JsDuck.
Building a cross framework application with Sencha Touch and Ext JS
We decided that we needed to build something special to really prove that we fully supported both Sencha platforms, and therefore we created a proof of concept application where the application code could be shared between Ext JS and Sencha Touch. The result: a real time collaborative scheduling screen that supports both versions of our component integrated with a NodeJS/Express backend. To achieve real time data sharing, we wired up the stores to Socket.IO, meaning changes made to tasks in one store are immediately sent to any other viewers of the schedule. In the course of writing the demo application, we detected some inconsistencies in our two API’s which we fixed. As a result, we hope there is very little need for any additional framework ‘normalization’ code when you write applications targeting both versions of our Scheduler.
Here is some code from the sample showing a subclass of the Scheduler, which can be used with both Sencha Touch and Ext JS.
extend : ‘Sch.panel.SchedulerGrid’,
userName : null,
draggingRecord : null,
socketHost : null,
constructor : function() {
// Create and connect to our socket
var socket = this.socket = io.connect(this.socketHost);
// Change default drag drop behavior to update the dragged record ‘live’
this.on({
eventdragstart : this.onDragStart,
eventdrag : this.onEventDrag,
aftereventdrop : this.onDragEnd,
scope : this
});
…
}
});
The interesting thing about this sample is how the underlying data store is updated ‘live’ when a task bar is being dragged. Since the stores are broadcasting their changes through Socket.IO, other browsers connected to the socket will receive any data changes instantly meaning you can always see when someone is moving a task in the schedule. Below is a video showing the application running on both Sencha Touch and Ext JS in Chrome and iPad (iOS simulator).
Integrating Socket.IO with the Sencha data stores was very easy. We just created a store App.store.mixin.SocketIO mixin, which emits local changes in the store and also listens to the socket for remote changes happening elsewhere. When a data package is received in the socket, the mixin simply applies those changes to its consuming store. The line count for the entire store mixin class is around 200. Here’s a snippet from the mixin, showing the initial registration of the listeners.
socket : null,
getSocket : function () {
return this.socket;
},
initSocket : function () {
var that = this;
var socket = this.getSocket();
socket.on(‘server-doInitialLoad’, function (data) {
that.onInitialLoad(data);
});
socket.on(‘server-doUpdate’, function (data) {
that.onRemoteUpdate(data);
});
socket.on(‘server-doAdd’, function (data) {
that.onRemoteAdd(data);
});
socket.on(‘server-syncId’, function (data) {
that.onRemoteSyncId(data);
});
socket.on(‘server-doRemove’, function (data) {
that.onRemoteRemove(data);
});
this.myListeners = {
add : this.onLocalAdd,
update : this.onLocalUpdate,
remove : this.onLocalRemove,
addrecords : this.onLocalAdd,
updaterecord : this.onLocalUpdate,
removerecords : this.onLocalRemove
};
this.addMyListeners();
//Load initial data to Store from Server
this.doInitialLoad();
},
…
The full example with all the source code can be found in a detailed blog post on the Bryntum blog.
You can find licensing information for Touch Scheduler on our website here. Additionally, to use our Sencha Touch based products, you must also have a valid commercial Sencha Touch license.
Summing up…
The Touch Scheduler shows that it’s possible to create a complex cross platform component, supporting both Ext JS and Sencha Touch. Are you ready to try it out? You can try some of the live examples on our site. As always, we’re eager to get your feedback on how to make the components even better, please make your voice heard in the comments section or in the community forums.
Additional resources:

We’re excited to announce the official release of Rapid Ext JS 1.0, a revolutionary low-code…

The Sencha team is pleased to announce the availability of Sencha Architect version 4.3.6. Building…

Sencha, a leader in JavaScript developer tools for building cross-platform and enterprise web applications, is…


