How to Build a Great Looking Universal App with Ext JS – Part 2
In part 1 of this series, I described what a universal app is and how it’s created in Ext JS 6. Now, I’ll show you how I built my application.
Folder structure
To create a high performance Ext JS 6 universal app, I used Sencha Cmd. I generated a workspace first, because in my folder I host multiple versions of my app (free and commercial), which all share the same code packages and framework.
To generate a workspace, I browsed to the downloaded Ext JS 6 SDK. From there, I typed the following command:
sencha generate workspace ../spotifinderworkspace6
This generated the following structure:
Then, I generated the application. I called it _engine. Why? Because I can create customized versions of my app with different behavior or branding. For example, a music app that plays songs in Pandora. To do that, I would only need to extend the engine Ext.Application, and override certain elements.
Here’s how I generated the application:
cd spotifinderworkspace6/ext
sencha generate app Engine ../_engine
Toolkits
The classic folder is the folder structure for the classic toolkit. It contains the rich components that are great for desktops (or tablets). Also, it has support for legacy browsers.
Here’s what my app in the classic toolkit looks like:
It kind of looks like Spotify. I used traditional desktop components with a custom stylesheet. Because the application is shown on a large screen, there is a lot of space for showing extras, such as the album artwork, additional information, and also the settings screen (which is docked to the side).
I created unique views. Some of these views require their own logic. That’s why my folder structure in the classic toolkit looks like this:
The modern folder contains lightweight touch components. These are great for touch devices, including phones (or in some cases, tablets too). These components are optimized for a touch experience instead of mouse and keyboard. Because these components are lightweight, they also perform really well on a mobile device which has less processing power.
Because the screen is small, just the absolute necessary components are shown. To open the settings view, tap the gear button. It will nicely slide in the settings screen with an animation.
Because it doesn’t contain too many components, my folder structure is small. Again, only views and some behavior code, which are required by this view, are unique. Everything else will be shared across toolkits.
The shared code can be found in the app folder:
Tip: You can extend from view controllers (VC) too.
For example, you could have a shared Viewport VC that contains most of the behavior. The Viewport VC of the classic and modern toolkit folders only contains code that’s required for their own components.
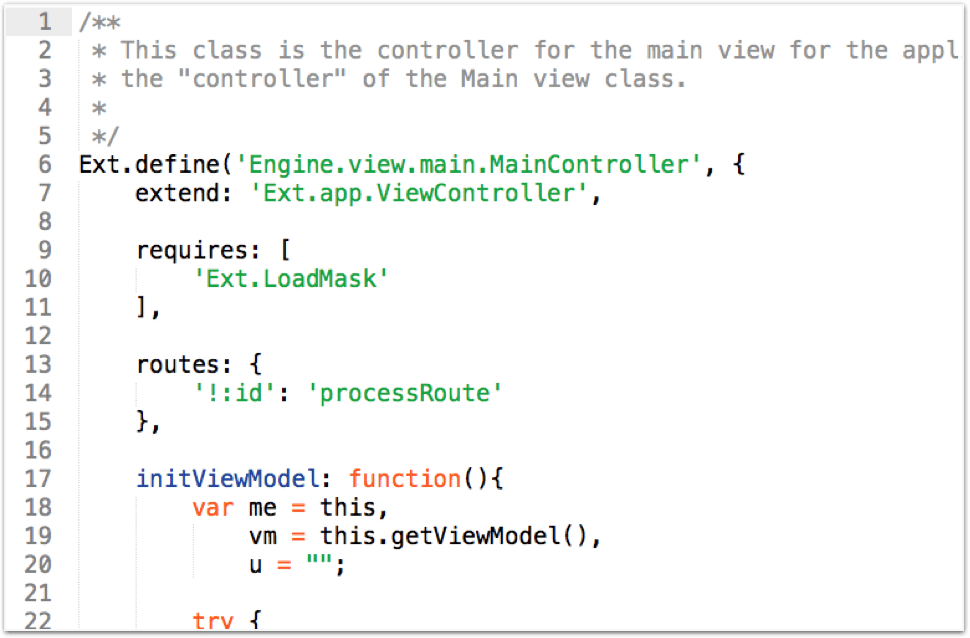
Here’s an example. Below is a snippet of the Viewport VC, which is located in the app/main/ folder. As you can see, it extends from Ext.app.ViewController. The class itself is called Engine.view.main.MainController.
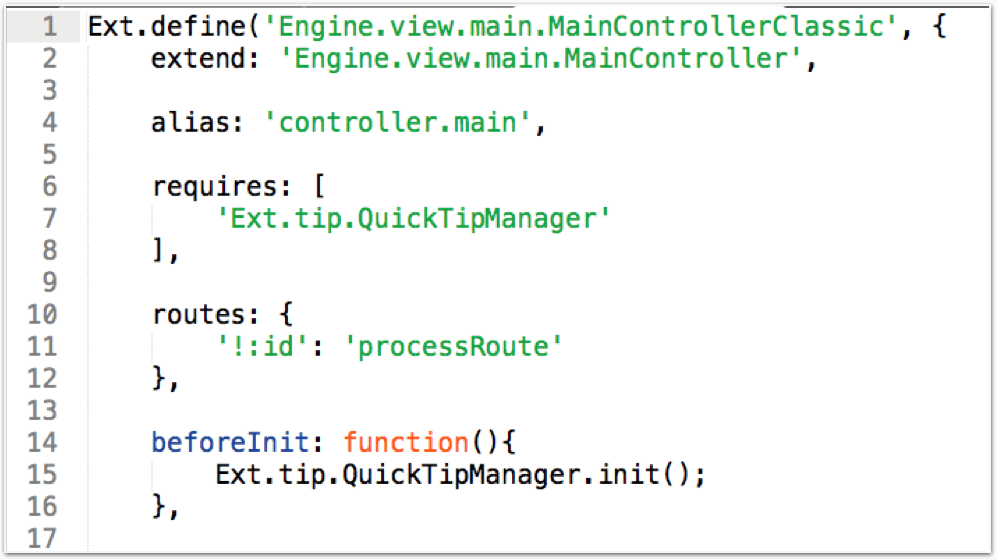
Now, here is the code of the Viewport VC in the classic folder. It’s located in the classic/src/main/ folder, and this time it extends from Engine.view.main.MainController, which is the shared VC. Don’t forget to put an alias in this class. That’s how you would link this classic view controller to the classic main view.
Microloader
The microloader can detect on which environment it’s running, and serve the right experience. This means when I load my application on a desktop, I see my desktop version of the app with the Spotify theme, and when I open my application on an iPhone, I get the phone interface with the iOS theme.
All the magic here is in the Ext.platformTags. You can even run this command from your browser console, in an existing Ext JS 6 app. It will provide the object with all kinds of information, such as the browser version you’re running, OS, device type, etc.
You can configure your app, so it serves the right experience. The secret here is the app.json file. You need to create build profiles, and you can bind every app.json setting you like to a build profile, such as the toolkit (component set) and the theme:
    "builds": {
        "classic": { //name of the build profile
            "toolkit": "classic", //component set
            "theme": "theme-spotifext", //name of the theme
        },
        "modern": {
            "toolkit": "modern",
            "theme": "theme-cupertino",
        }
}
Switching the experiences is handled in the index.html file. When you generate your application with Sencha Cmd, this will be all stubbed out for you.
MVVM Pattern
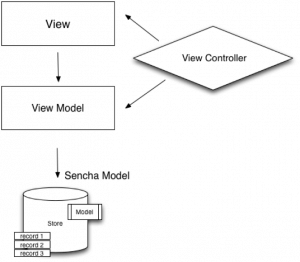
With Ext JS 6, you can use the MVVM pattern.
View – all components on your screen
ViewController – logics for a view
ViewModel – for binding data to a view
data model – structure of your entity
data record – the actual data
data store – client-side cache
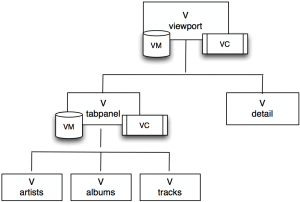
All views in Ext JS can be nested, and so can the view models and view controllers.
The benefits of this pattern is that code is easy to read and maintain.
It’s a consistent file structure for your code and classes, and it facilitates code reuse.
Why Ext JS vs. Open Source
With Ext JS 6, you get an all-in-one solution. You don’t need to maintain various dependencies and have expertise in many different technologies that all need to work together.
For the application that I created, I used the following Ext JS 6 solutions.
Ext JS 6 |
Example Open Source Solution |
| Sencha Class System | ECMAScript 6 Classes |
| Border Layout | JS + CSS |
| MVVM Architecture | Angular JS |
| Desktop App | Bootstrap / Responsive CSS |
| Mobile App | jQuery Mobile / Ionic |
| Promises | ECMAScript 6 |
| Grids | jQuery Plugin |
| Touch Gestures / Events | JS |
| Routing | AngularJS Plugin |
| Offline Caching | HTML5 / JS |
| Theming | Sass / CSS |
| Sencha Cmd | Grunt + Yeoman + Bower |
I could have used an open source solution, but then I would have had to stack technologies on top of one another. For example, ECMAScript 6 is not supported by Internet Explorer yet. With Bootstrap or responsive web design, my users would have to download lots of code, which they don’t even see, and it’s not optimized for each device (as described in my previous blog post). There are jQuery plugins for grid components, but these are not half as powerful, and don’t perform well with large data sets. And who should I call when my AngularJS plugin suddenly stops working with the latest browser update?
My application is just a simple app, and I already would have at least 10 dependencies. What about a real enterprise app, which has a codebase that’s 50 times bigger? I would need to have knowledge of all these various tools, cross my fingers that these technologies work well together, and are future proof for the next 5 or 10 years (while browsers are upgrading).
Conclusion
That’s exactly the reason why I chose Ext JS 6. An all-in-one solution, where everything is configured the same way, every piece works together, and looks the same. And because Sencha is a commercial company, there is always a support number to call, and they will make sure that my app works in the future.
Resources
Watch our webinar: Secrets to Building a Great Looking Universal App. I reveal many more tricks that I used to create my music app.
Other Handy Links:
Getting Started with Ext JS 6
How to Create a Dark Ext JS Theme

We’re excited to announce the official release of Rapid Ext JS 1.0, a revolutionary low-code…

The Sencha team is pleased to announce the availability of Sencha Architect version 4.3.6. Building…

Sencha, a leader in JavaScript developer tools for building cross-platform and enterprise web applications, is…


