Leveraging PhoneGap within Sencha Touch
Introduction
With the release of Sencha Touch 2.3 and Sencha Cmd 4, creating your cross platform hybrid applications has never been easier. PhoneGap is now a key feature in the Sencha Touch mobile workflow integrating seamlessly into the newly released, NodeJS based, PhoneGap command line interface. For an in-depth look at creating an application with Sencha Touch and PhoneGap, or Cordova, check out the Sencha & PhoneGap Video Tutorial.
Creating Your Application
Once you have downloaded the Sencha Touch 2.3 framework and installed Sencha Cmd, you can quickly generate an application with the following command:
//sencha generate app [path/to/app] [AppName]
$ sencha generate app ~/Desktop/MyApp MyApp
You will then want to make sure to follow the PhoneGap CLI Getting Started Guide to get your system up and running with PhoneGap and any dependencies for the native platforms you wish to deploy to. **Remember** if you are planning on building with PhoneGap Build, you simply need to install NodeJS and the PhoneGap CLI, and don’t have to worry about native SDKs.
To add PhoneGap support to any application, that is Sencha Cmd 4 ready, you run the following command with the optional *APP_ID* and *APP_NAME* arguments.
//sencha phonegap init [APP_ID] [APP_NAME]
$ sencha phonegap init com.mycompany.MyApp MyApp
Folder Structure
Your application is now ready to take advantage of the power of the Sencha Touch framework with the ease of native development provided by PhoneGap. If you are a Sencha developer already, you will notice your normal application build workflow is the same as always, and we have only modified the normal folder structure slightly by adding in a nested PhoneGap project.
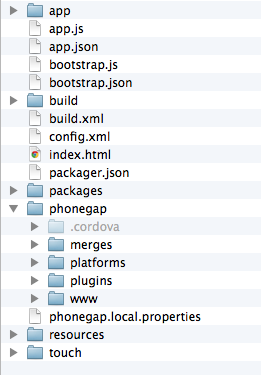
Sencha and PhoneGap Folder Structure
Custom Configuration
You can configure your PhoneGap application using the standard config.xml, as you would normally do. Sencha Cmd provides a **’phonegap.local.properties’** file to configure the build process. Not only can you use PhoneGap locally to create your own custom native projects, but Sencha Cmd is also integrated into PhoneGap Build allowing you to build your application easily without having the native development tools locally. Below is a sample of the properties file you can configure.
# The following are supported platforms for local building (blackberry is version 10)
# android, blackberry, ios, wp7, wp8
#
# The following are supported platforms for remote building (blackberry is version 6)
# android, blackberry, ios, symbian, webos, wp7

# This property can be a single platform or a space delimited list
phonegap.platform=ios

# This determines if build is remote (phonegap build) or local
phonegap.build.remote=false

# Username for PhoneGap Build
phonegap.build.remote.username={username}

# Password for PhoneGap Build
phonegap.build.remote.password={password}
Development
The great benefit of this integration is that your development workflow need not change at all. If you are a PhoneGap user, you will want to familiarize yourself with the syntax and structure of a Sencha Touch application, but building your PhoneGap application is business as usual. Since you have a full PhoneGap project inside your Sencha Touch project, adding plugins and using the PhoneGap CLI tool will also work just fine. If you are a Sencha Touch user you will want to go through the PhoneGap Docs, but the syntax is very simple to pick up. You will quickly be able to access native features and hardware within your Sencha Touch application, and by using **’Ext.browser.is.PhoneGap’**, you can detect when you are inside your natively wrapped application or running in the browser.
Building and Testing
Building your application for testing in the native emulator or on a device is also as easy as a single command. The *-run* flag is optional and allows you to decide if you would like to run your application after it is built, or simply build the native binaries you will then take to a device.
$ sencha app build -run native
Beyond the Command Line
If the command line is not your style and you find yourself using more ‘industrial strength’ IDEs with ANT support, you will be pleased to see that the Sencha Cmd 4 generate application comes with human readable ANT targets for running common commands from right inside your IDE. For those who love Sublime Text, there is also a handy plugin called SuperAnt that will let you get in on all the ANT goodness.
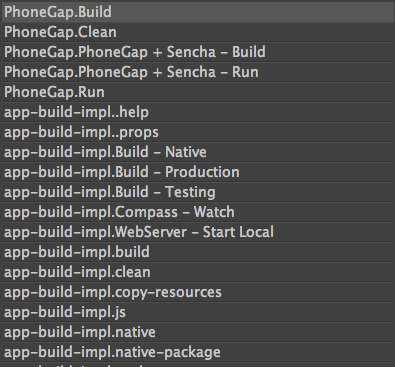
Sencha Cmd 4 Targets
Apache Cordova Support
Sencha Cmd 4 not only supports PhoneGap but also Apache Cordova for developers that don’t want/need the extras provided by PhoneGap. The commands are identical except instead of initializing PhoneGap, you simply use Cordova instead.
//sencha cordova init [APP_ID] [APP_NAME]
$ sencha cordova init com.mycompant.MyApp MyApp
For more information, watch the Sencha & PhoneGap Video Tutorial as it goes into detail on both processes.
A Quick Camera Demo App
Adding PhoneGap or Cordova APIs to your application is very simple. If you already have a good understanding of the Sencha framework, learning the Cordova API should not be a problem. In this demo, we will look at a small code snippet to add native photo library support to your Sencha Touch application.
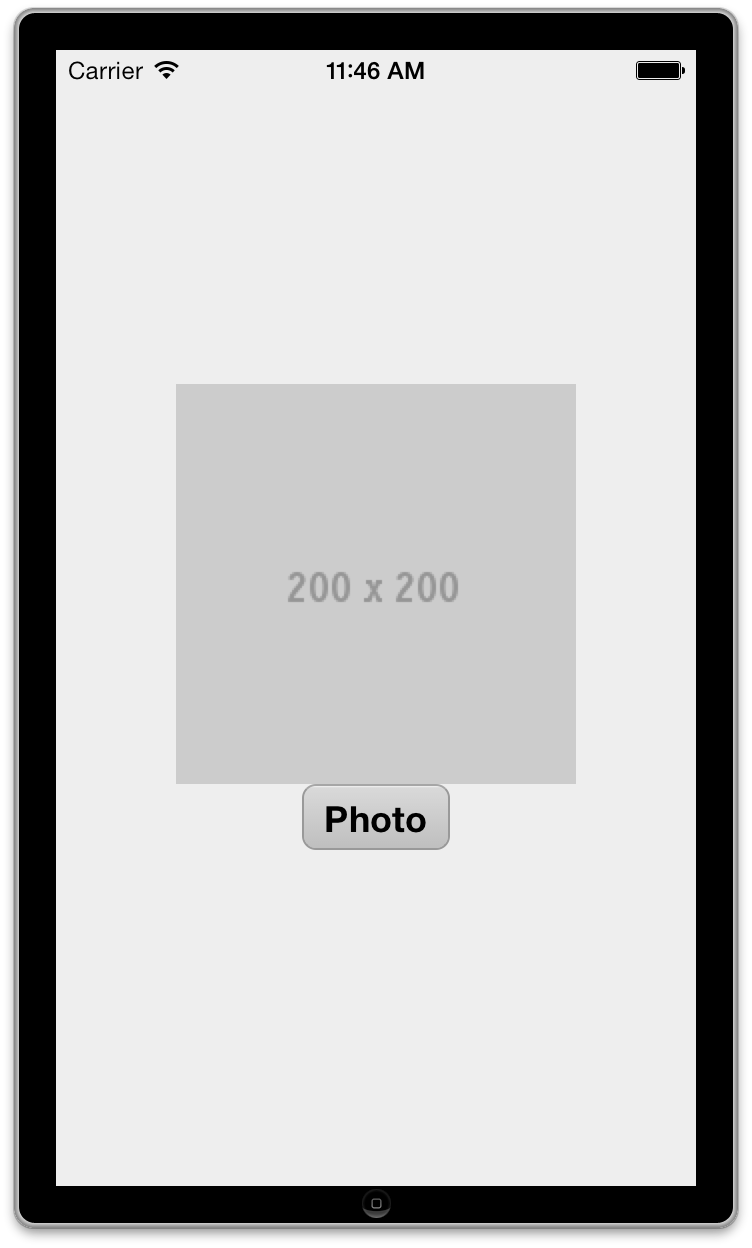
Sencha Demo App
extend: ‘Ext.Panel’,
xtype: ‘main’,
requires: [
‘Ext.Button’,
‘Ext.Img’
],
config: {
layout: {
type:”vbox”,
pack:”center”,
align:”center”
},
items: [
{
xtype: “image”,
src: “http://placehold.it/200×200”,
width: 200,
height: 200
},
{
xtype: “button”,
text: “Photo”,
handler: function() {
function success(image_uri) {
var img = Ext.ComponentQuery.query(“image”)[0];
img.setSrc(image_uri);
}
function fail(message) {
alert(“Failed: ” + message);
}
navigator.camera.getPicture(success, fail,
{
quality: 50,
destinationType: navigator.camera.DestinationType.FILE_URI,
sourceType: navigator.camera.PictureSourceType.PHOTOLIBRARY
}
);
}
}
]
}
});
In this view, we create a simple image component with a placeholder 200 by 200 image. **A quick note here**, you will need to add placehold.it to your config.xml as an allowed origin.
We then add a button handler and call the Cordova Camera API. If you are a current PhoneGap user, you will notice that you use the normal APIs that you are used to in other application frameworks.
Lastly, before you build this application, you will need to add the camera plugin to our PhoneGap application. As of PhoneGap 3.0, all extra libraries are added as plugins (Geolocation, Camera, File, etc). This is done by running the following command from your **'{application}/phonegap’** folder.
phonegap local plugin add https://git-wip-us.apache.org/repos/asf/cordova-plugin-camera.git
Now, you can build and run your application in the simulator by running:
sencha app build -run native
For those of you who like to see a whole project, I have prepared this ready to go demo, simply download and extract on your system. Then, from inside the folder you will run:
sencha app build -run native
Don’t forget to download some images to your iOS simulator. You can search google images for anything, and long press on any image that will give you the option to save it to the photo library.
Conclusion
Here at Sencha, we’re really excited about these features and hope you are too. We feel that PhoneGap has the community and the leadership to perfectly complement our strong belief that HTML5 apps can compete in the mobile market. Stay updated by checking out our blog and stop by the Sencha Vimeo page for updated tutorials, tips and tricks!
We’re excited to announce the official release of Rapid Ext JS 1.0, a revolutionary low-code…

The Sencha team is pleased to announce the availability of Sencha Architect version 4.3.6. Building…

Sencha, a leader in JavaScript developer tools for building cross-platform and enterprise web applications, is…


