

 Rapid Ext JS


Using Sencha Test with Sauce Labs
December 6, 2017
183 Views
Introduction
In this blog post, I will show how it’s possible to leverage Sauce Labs for quickly testing your web applications across a number of different browsers and platforms without having to build and maintain your own internal browser farm.
When it comes to testing your web-based applications, Sencha Test enables you to perform unit and end-to-end testing of your apps with ease.
Sencha Test consists of four different pieces:
- Sencha Studio – where you can create new test suites, author tests using the Jasmine test framework and the Sencha Test Futures API, access features like Inspector to generate stable element and component locators, configure browser farms and browser pools, perform test runs, and view test run results and code coverage reports
- Sencha Test Runner – executes the test runs against a variety of configured browsers or browser farms
- Sencha Test Archive Server – a process that is left running on a server, and will receive the test run results, code coverage reports, and captured screenshots. All of this data is stored in the Archive Server, and can be retrieved by viewing results via the Sencha Studio interface
- Sencha Test CLI – combines both the Sencha Test Runner and the Sencha Test Archive Server. The CLI enables integrations to your Continuous Integration (CI) environments, such as Jenkins and TeamCity
Testing Your Web Apps in Browsers
Out of the box, Sencha Test enables you to quickly execute your authored tests against locally installed browsers. When it comes to real-world testing though, you will likely want to commence a test run on a wide range of different browsers, maybe on multiple different version numbers and operating systems.
This is where browser farms come into the picture. A browser farm is made up of a collection of virtual machines, each with a particular version of a browser installed. When you link these together, you have a browser farm, and can easily fire up an instance of a particular operating system and browser in order to run some tests.
There are two different routes you can go down, when deciding on a browser farm solution:
- Building and configuring your own browser farm
- Using a cloud-based browser farm provider
Building and Configuring Your Own Browser Farm
One option is to build your own infrastructure of multiple operating systems, with different browsers installed on to each, and configuring them in a WebDriver farm.
It takes a lot of time and effort to build and maintain this type of infrastructure, which is why companies may choose to use a cloud-based service.
We won’t be looking at building our own browser farm in this blog post, but for further resources on using a Standalone Selenium Server for this purpose, please refer to the Sencha Test documentation, or this previous blog post.
Cloud Based Browser Farms
A cloud based browser farm is where you make use of a third party’s existing virtual machine and browser infrastructure when executing tests.
Sencha Test supports two popular cloud-based browser farms:
- Sauce Labs
- BrowserStack
Using a cloud-based service offers quick ramp-up times, and much lower long-term overheads compared to building and maintaining your own browser farm.
In this blog post, I’ll focus on Sauce Labs.
Sauce Labs
Sauce Labs offers a cloud-based browser farm with over 500 different combinations of operating system and browser combinations.
This makes it very quick to run tests against a particular browser and operating system with minimal effort, as they have the browser instances ready to fire up.
Following the steps below, I’ll show how to get started with Sauce Labs, and configuring the service for use within Sencha Test.
I’ll be using the example Sencha Test workspace in this GitHub repository, and will run those tests against an application hosted on the Internet, using the Sauce Labs environment.
- Navigate to the Sauce Labs website, and register for a trial if you don’t already have a login.
- After logging into your Sauce Labs account, navigate to the My Account screen and scroll down to view your Access Key. Copy this key to the clipboard. You will need to use this key within Sencha Studio.
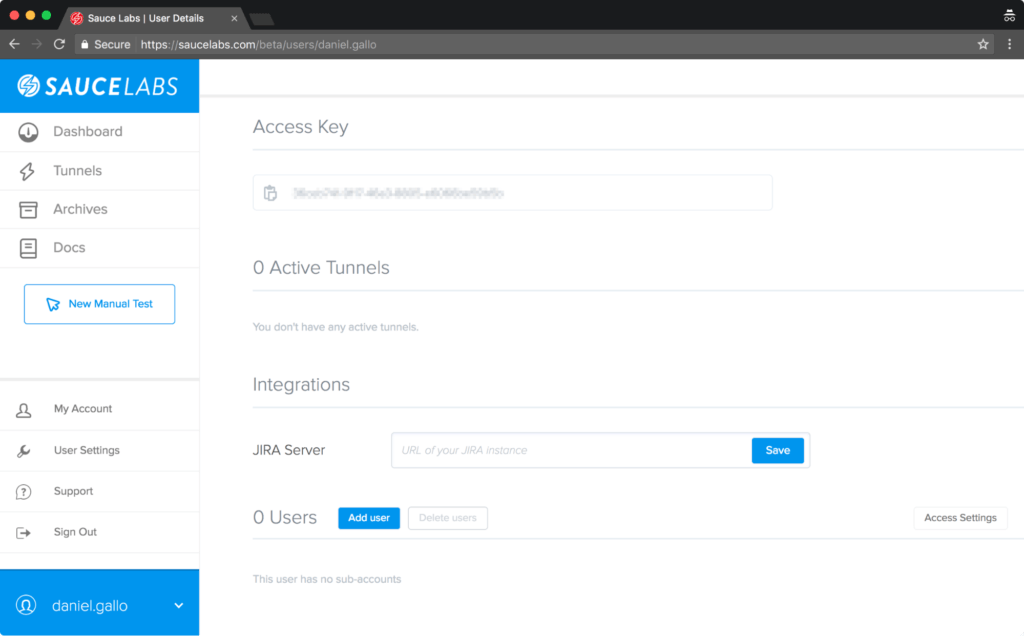
Sauce Labs “My Account” page, showing the Access Key
- In Sencha Studio, select the Browsers tab, and Add a configuration for Sauce Labs:
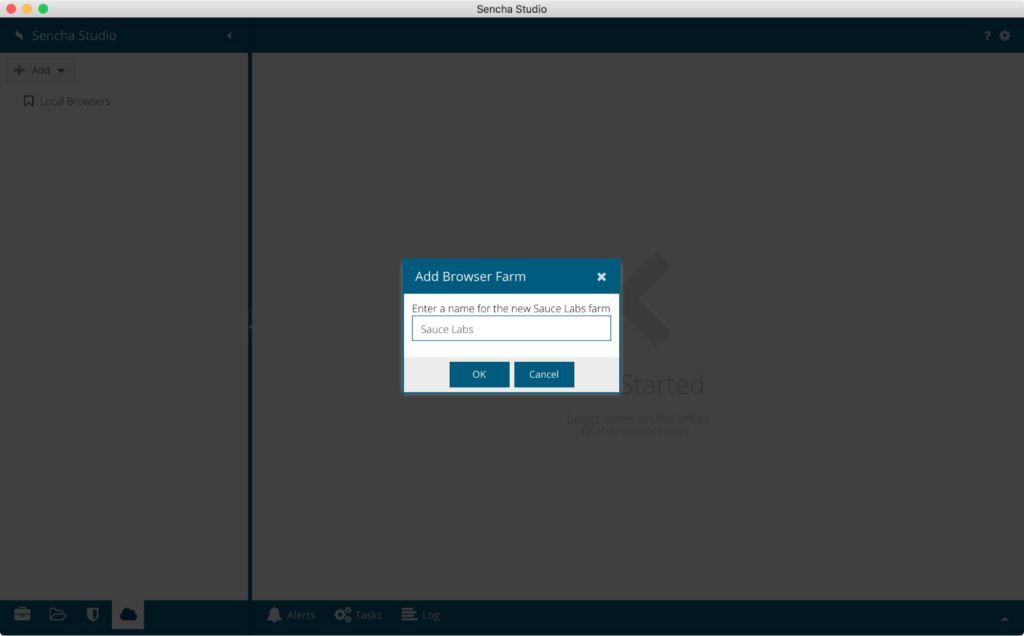
Adding a new Sauce Labs configuration
- After adding the new Browser Farm, change the settings by specifying your Sauce Labs Username, Access Key, setting Concurrency to 3 and clicking Save:
Note: By setting Concurrency to 3, this tells the browser farm to test with 3 different browsers simultaneously. If this was left at 1, only a single browser would be used, and when that finishes, only then would the next browser be started.
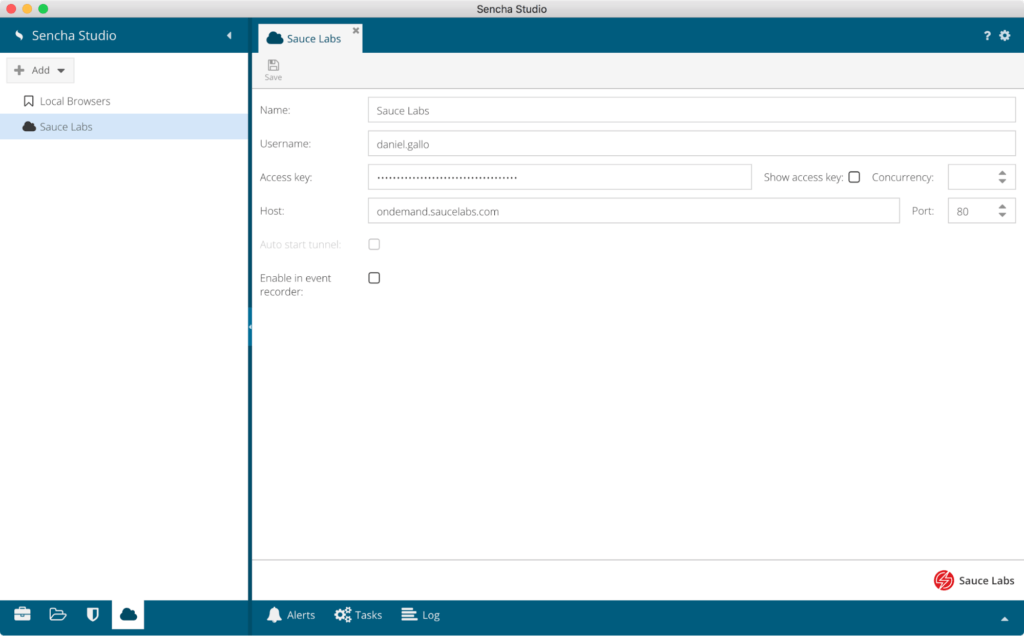
Defining the settings for Sauce Labs
- Once the settings have been populated, you can start to specify which browsers you want to use. This is done by creating a Browser Pool. Right-click on the Sauce Labs node in the tree and select the option to Add pool. I’ll use the name “Modern Browsers”, as I’m going to add a few modern browsers to this Pool.
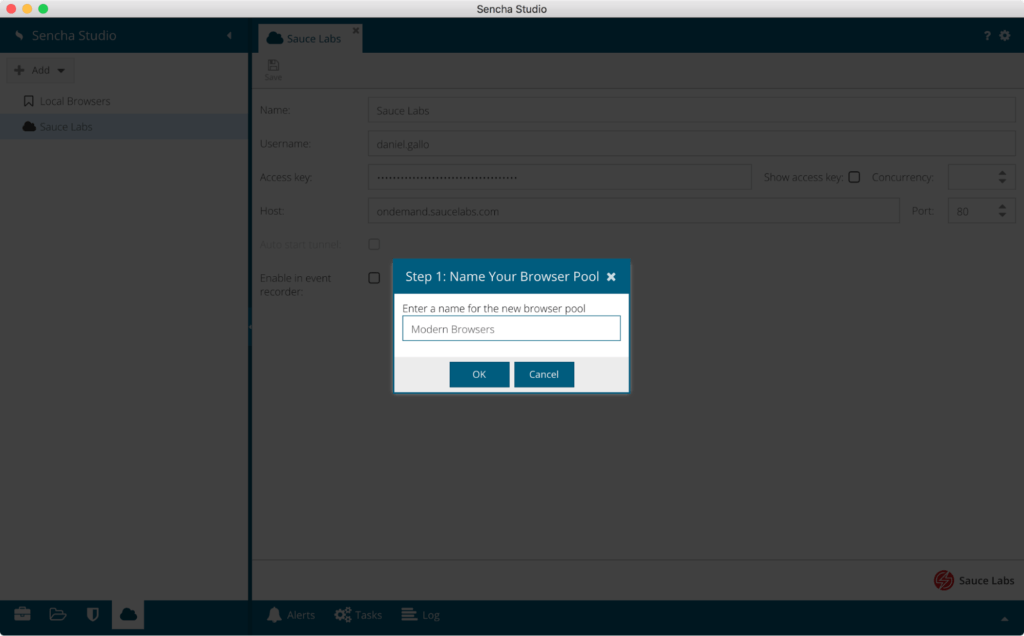
Adding a new Browser Pool
- You will then be prompted to choose a location to save the configuration file for this Browser Pool. Normally you would save this in the Sencha Test project/workspace folder.
- Select the newly added Browser Pool, and using the drop-down list at the bottom of the screen, select Chrome. Click the Add button to add this browser and version combination to the list. You can then optionally select which Platform you want this browser to run on, along with a desired screen resolution.
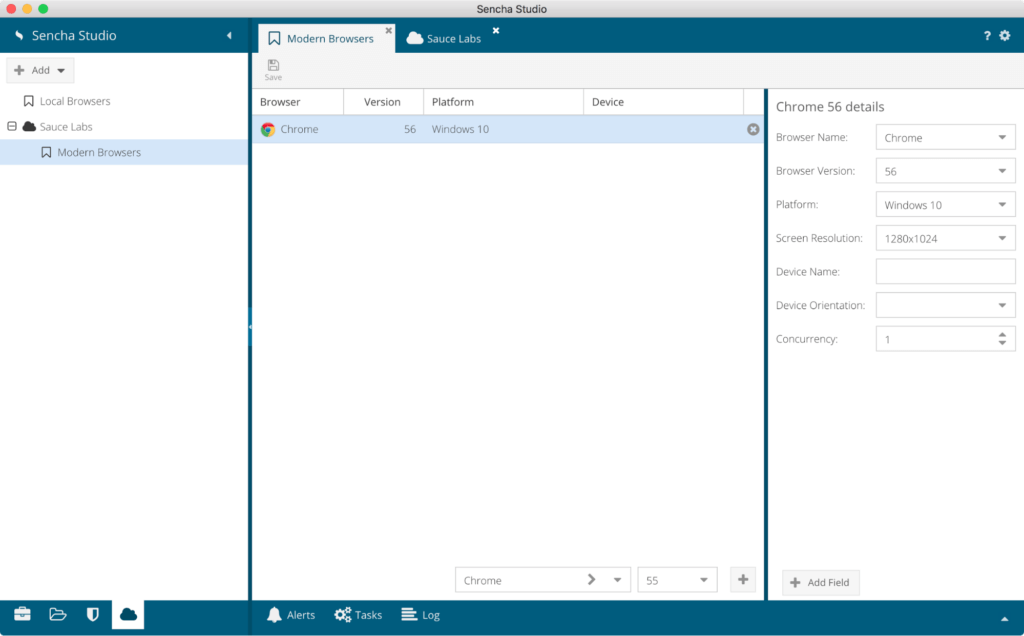
Adding a new browser to the Browser Pool
- Here, I’ve added Chrome, Internet Explorer and Edge browsers to the list, and set the platform on all of them to Windows 10.
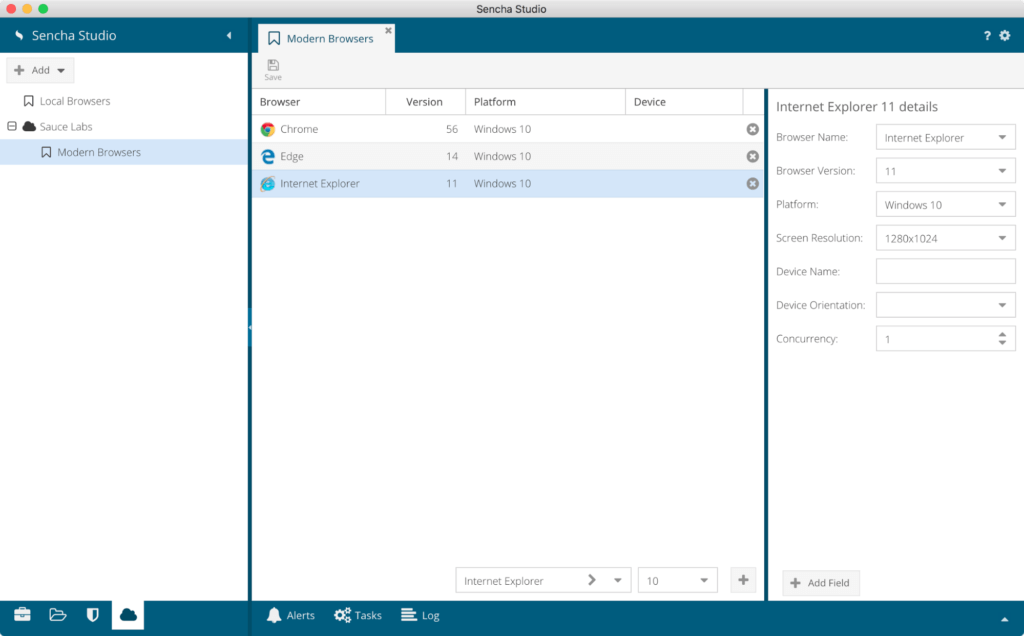
Multiple browsers added to the Browser Pool
- After defining the browsers in the Browser Pool, you can then return to the Project tab, select the Scenario that contains the test suites, and see the list of Sauce Labs browsers.
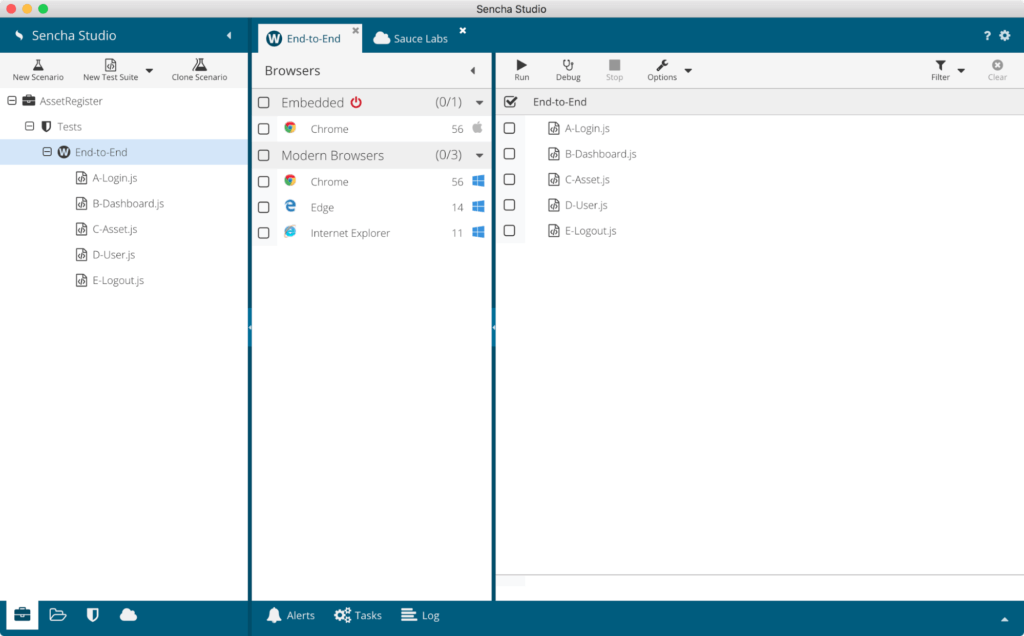
Scenario screen, showing the list of Sauce Labs browser
- Select the Modern Browsers pool, by checking the box next to “Modern Browsers”, and click the “Run” button to commence the tests against all 3 browsers.
- Login to your Sauce Labs account, and you will be able to see the three jobs running:
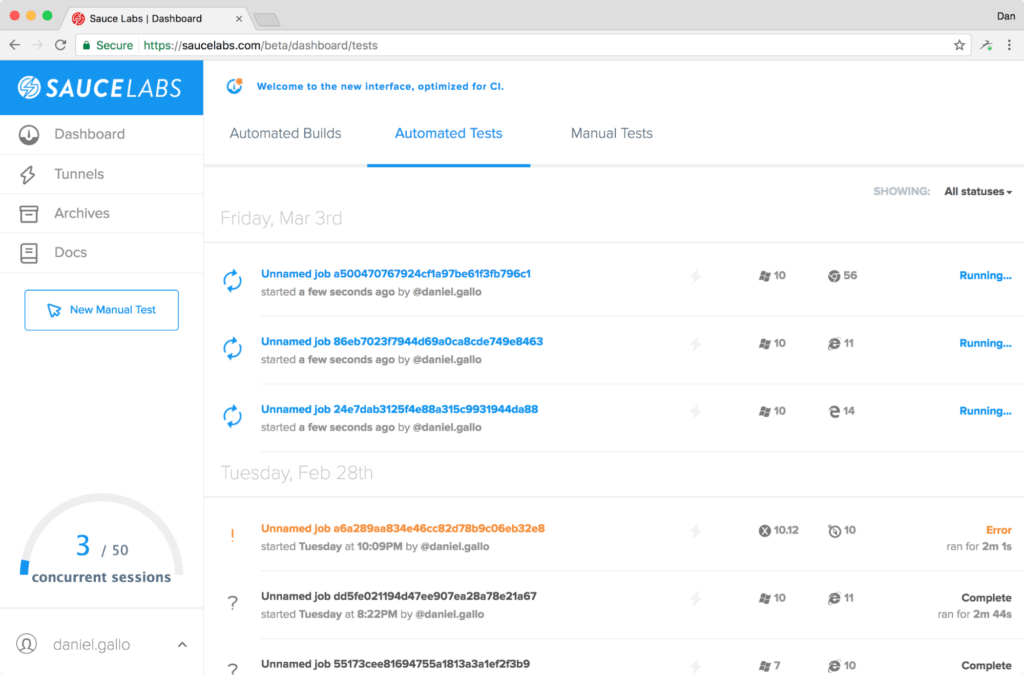
Sauce Labs shows a live list of active jobs
- Clicking on one of the jobs will allow you to preview the application running on the remote browser:
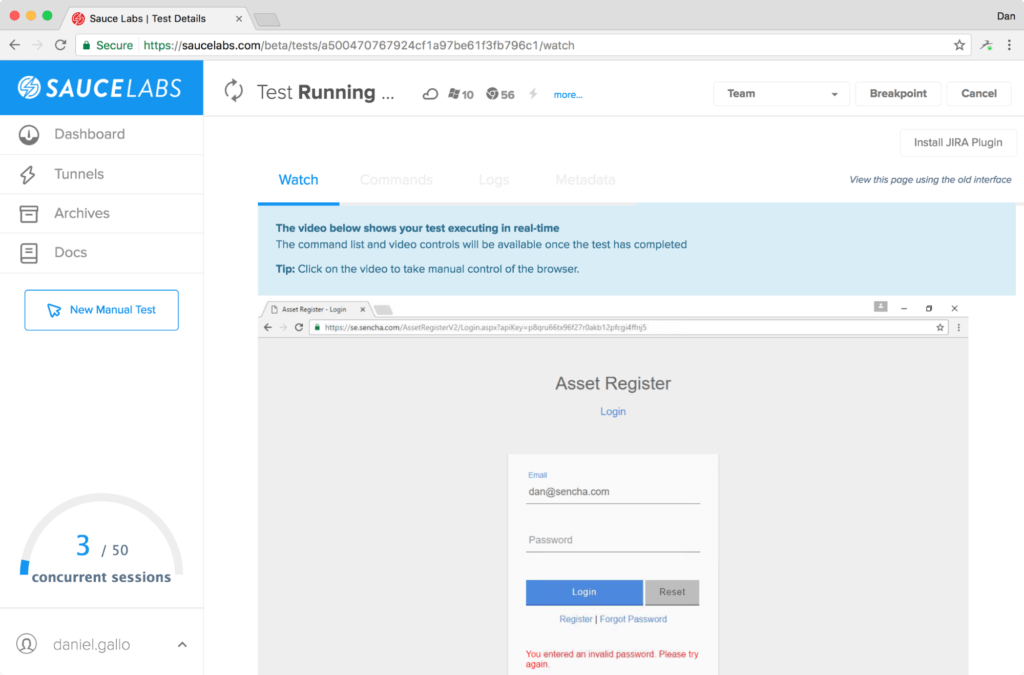
Sauce Labs lets you preview the remote machine running the app
- When the tests complete, you should hopefully see green ticks in Sencha Studio next to each of the test suites, for each browser, indicating the tests passed without any failures!
Testing Internal Applications
In the example above, I showed how to configure Sauce Labs to run tests against an application hosted on the Internet.
Quite often though, the application to be tested is an internal-only app. In those instances, with Sauce Labs being an external service, it is unable to see or access the internal application in order to test it.
Sauce Labs provides a solution though; their Sauce Connect Proxy creates a secure tunnel between your internal machine and the Sauce Labs environment. Provided this process is started before a test run, Sauce Labs browsers will be able to resolve your internal IP addresses / host names in order to test your application.
Running Tests From Your CI Environment or Command Line
So far, I’ve only shown how to execute tests from within the Sencha Studio user interface. It’s also possible to execute tests from the command line, using Sencha Test CLI (STC).
Using the command shown below, executed from the root of the workspace folder, the same tests can be executed on the command line.
stc run -p "Modern Browsers" -s test/end-to-end/
You simply need to define the Browser Pool to use (with the “-p” switch), and the path of the Scenario to run (“-s”). You can also optionally store the results in the Sencha Test Archive Server, as outlined in the documentation.
Conclusion
Sencha Test makes it possible to easily run tests against locally installed browsers. If you need access to a wider range of browsers though, across multiple operating systems and browser versions, that’s where Sauce Labs can come in useful.
Rather than spending time and effort manually configuring and maintaining an internal browser farm, hosted browser farms such as Sauce Labs already have the infrastructure configured on their end, and you are able to quickly and easily leverage their various browser instances to test your web applications.
If you’d like to try and run the tests shown above, please download a trial of Sencha Test today, and use Sencha Studio to open up a downloaded copy of the workspace from this GitHub repository!
Did you find the content helpful?
 0
0

 0
0

Latest Content

Ext JS 7.8 Has Arrived!
The Sencha team is pleased to announce the latest Ext JS version 7.8 release. Following…
May 13, 2024
React Apps Development Using ReExt with Ext JS Components
The world is moving fast towards online businesses. Businesses are established online via social media,…
May 1, 2024

How to Write Unit Tests with Sencha Test
In modern software development, unit testing has become an essential practice to ensure the quality…
April 19, 2024


